
When it comes to the dream of the sky, it is attracted by the vastness, splendor, and depth of the sky. After photographing the ordinary Galaxy, I believe that every little partner will want to pursue different things. He will wonder whether he can photograph a different starry sky than others. Can he photograph the whole piece of the Milky Way? . This article brings you the pre- and post-grading methods for the Galaxy Arch Bridge.

"reverse world"
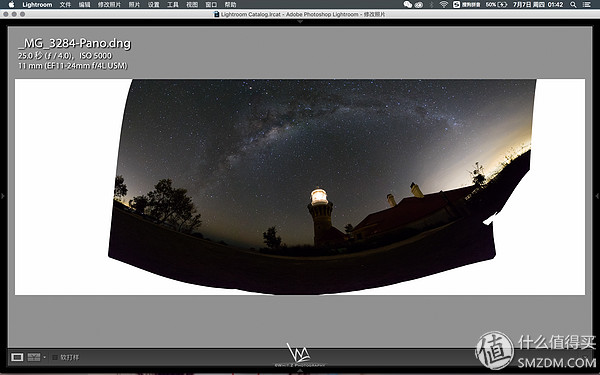
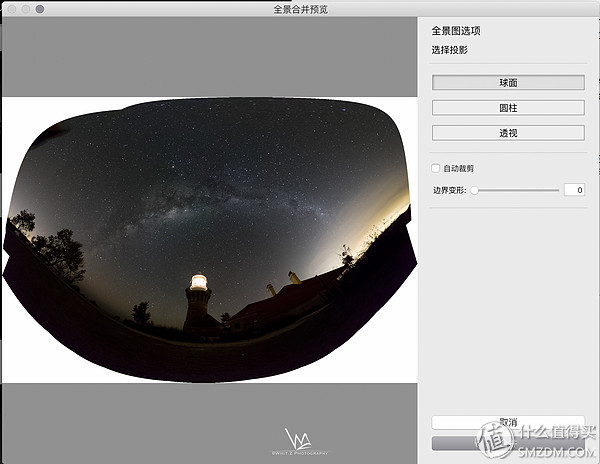
25s F4 ISO5000 Canon 5Ds R & 11-24mm F4 9 Elevation Joints
The following figure as an example to explain the connection and color adjustment of the Galaxy arch bridge
Half Moon Bend
25s F4 ISO5000 Canon 5Ds R & 11-24mm F4 33 Tabs
For the early shooting of the Galaxy, there is not much introduction, nothing more than to squeeze the performance of their own machines. In the absence of the equatorial mount, the exposure time is usually within 25s, the aperture is open to the maximum, and then ISO according to their own performance and personal acceptance of the machine Adjusted to 1600-5000 (Why there is such a big range, because each lens has a different maximum aperture, so to make it clear that the Galaxy starts at least 1600, then to 5000 it is between the individual and the galactic Choice). Look at the comparison of the same ISO different exposure times
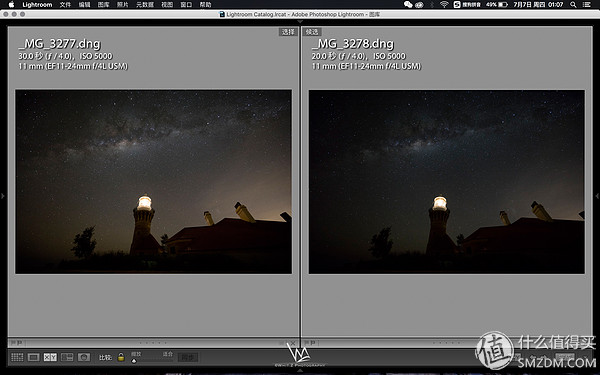
30s exposure VS 20s exposure

30s exposure VS 25s exposure
It can be seen that the change is still quite obvious, but for the success of the film, for insurance purposes, this article uses a 25-second exposure.
Equipment requirements
After the galactic parameters were spoken, the next focus was on the equipment requirements for the splicing.
A stable tripod, a steady and angularly-adjustable head, and a spirit level (the tripod, the head, or the camera are all available), like this one
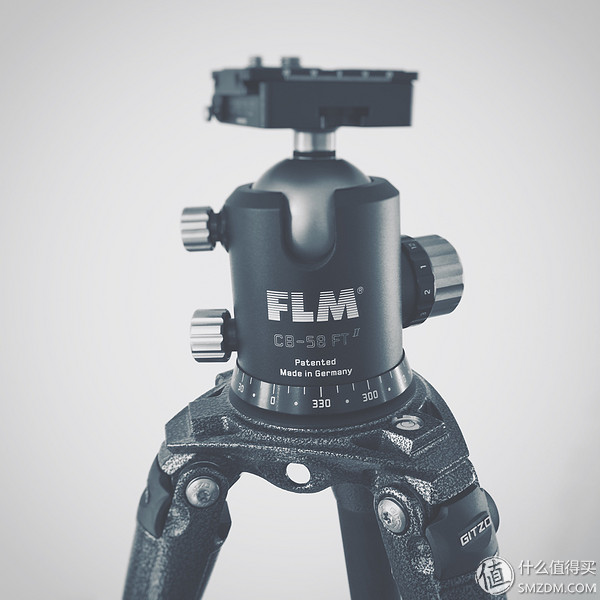
Pay attention to the bottom of the head
Pre-production
The next step is to pat it happily. Each photo should be overlapped by at least one third or more, at least one third or more, or at least one third or more. The important thing is to say it three times! Photographs taken in this way do not reach the crematorium until later. So the pan-tilt with the scale just mentioned at this time comes in handy. My own method is to take 15 degrees of pan/tilt after each shot of a photo (look from left to right or from right to left) ), so that the basic use of a common lens shot images will overlap more than one third.
Remembering the overlap of one-third of this, it is time for the level to appear. No matter what kind of level (except the level on the tripod), the camera needs to be corrected again after each rotation. This has the advantage of being connected later. With the service, mom no longer has to worry about the software connection being unsuccessful.
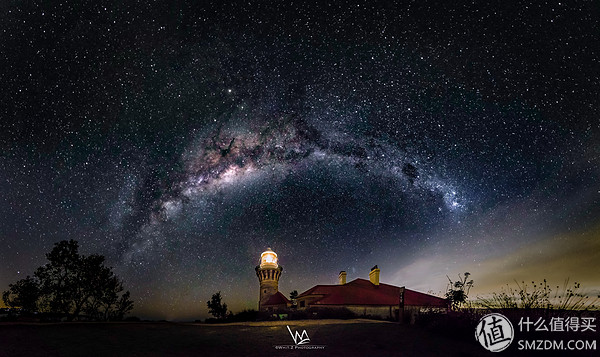
Remember that the above two points can be followed by pictures and scams. In general, the horizontal panoramas are connected by a vertical single sheet (don't ask me why it is estimated to avoid lateral distortion), so in order to shoot this Zhang Yinhe arch bridge took a total of 11 from left to right, that is, the lens turned 165 degrees, because the characteristics of 11mm ultra-wide angle has in fact covered more than 180 degrees.
From these 11 maps, we can see the location of the shooting, about 15 meters from the front lighthouse (no experience, too close!!!), trying to use the ultra-wide angle of 11-24 to enter the Galaxy that is already overhead. Tucson broke.) When I was filming, I felt so cool and simple. I could fly with it. Who knows when the computer splices? The computer is rejected....
Here's a summary of lessons learned:
It is best not to use ultra-wide-angle film, visual distortion will be very large
Not too close to the scenery, a row of pieces will cry
The lens elevation angle can not be too large, the same distortion is very scary
Well, then there is a small partner to ask, we have seen this for so long to see this for us? ? Of course not, through the current PS Dafa even if it is spelled out like the ugly monster on the map can also be saved back (specifically after the article will be described in detail), as shown below
25s F4 ISO5000 Canon 5Ds R & 11-24mm F4 11 Tabs
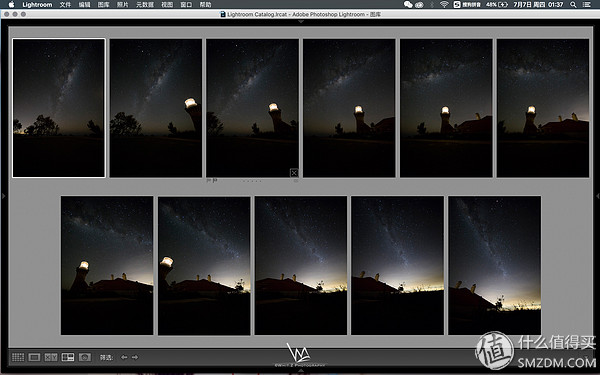
But such an edge is unacceptable, there will be obvious traces of stretching. Fortunately, when preparing for shooting that day, more preparations were made. In the same set of films, I took three rows, that is, shooting with different pitch angles. The group of 11 photos, and finally with these 33 photos to spell the beginning of this article
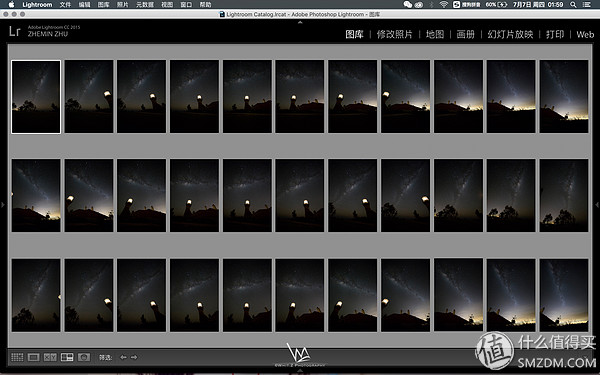
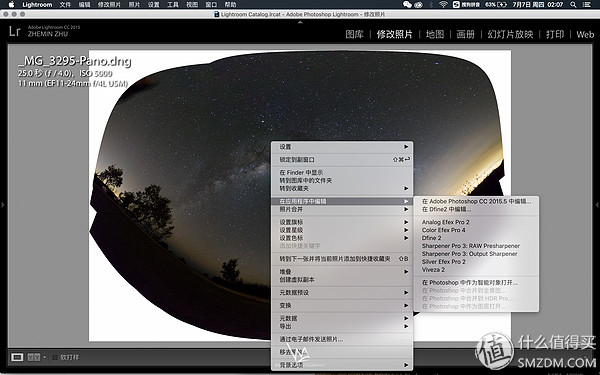
It can be seen that I took three rows from left to right, from right to left and then from left to right. During this period, three different pitch angles were used to collect the most sky and land scenery. This was selected in Lightroom. 33 photos without any modification right-click to select photo merge panorama
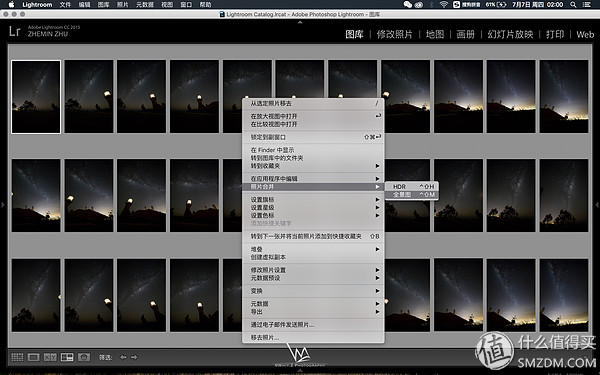
Wait for the machine to finish processing and select the sphere
Right click again after merging, select Edit in application - Edit in PS
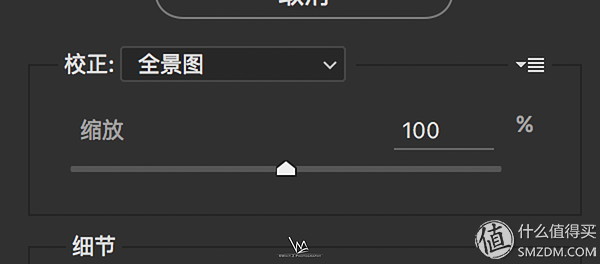
Visual correction
After entering the PS is to do visual correction, flatten the horizon and the building righting a series of work, filter selection adaptive wide-angle
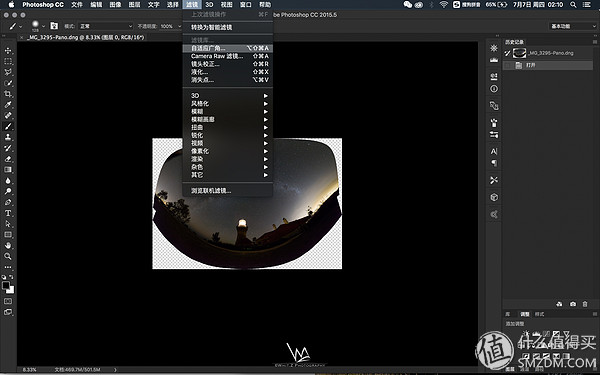
Select Panorama
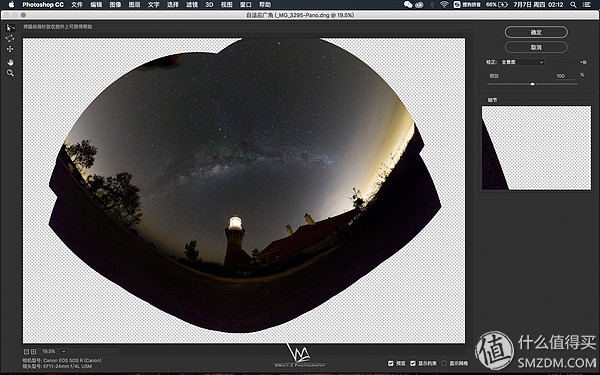
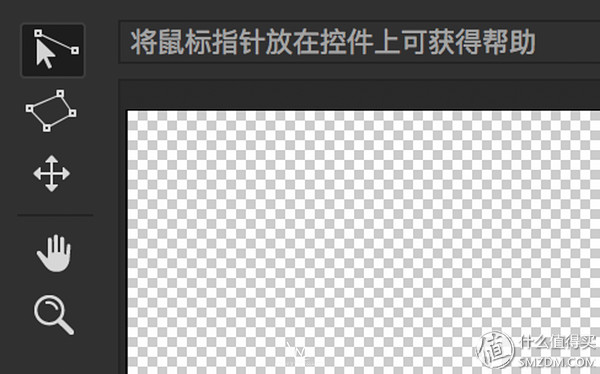
Then select the constraint tool in the upper left corner
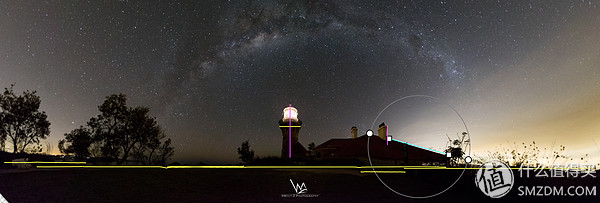
Then click on the ground in the picture from left to right (with personal preference) to draw a line, this line is the computer automatically recognized curve (according to the curvature of the horizon in your chart, but not too long will fail)
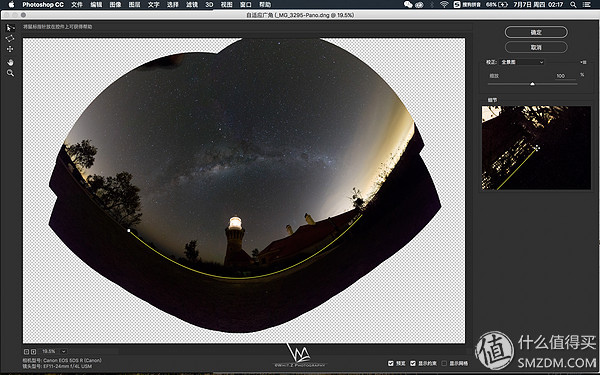
After releasing the mouse it will straighten the line and also flatten the line below the line
After right clicking on this line to select the level, it will automatically adjust the horizontal line
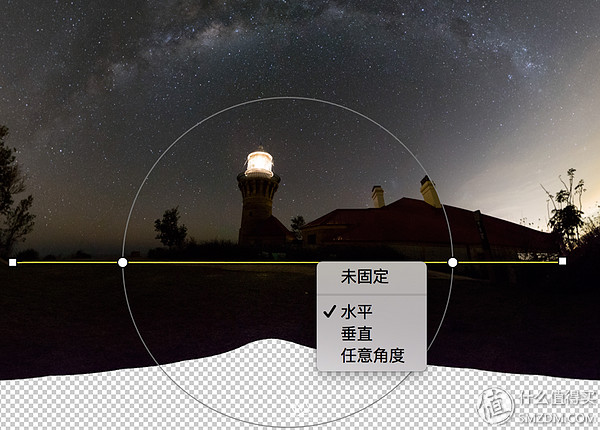
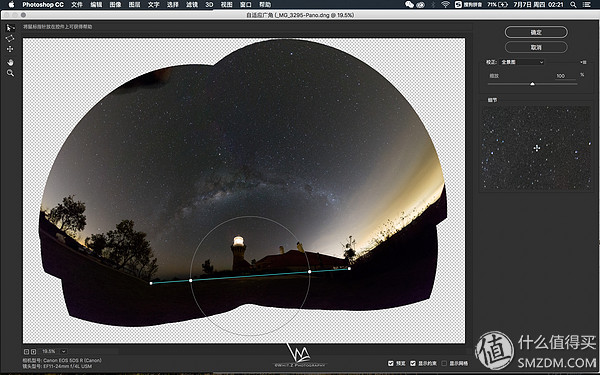
The constraint tool is used in this way. In the latest Mac version of the PS, the constraint tools are three colors,
When the line is drawn initially, it will be blue. When the mouse is released, it will straighten the area covered by the screen centerline. (At the same time, the computer will automatically recognize the bending in the picture. As far as possible, the line is the part you want to straighten.) The second and third types are horizontal (yellow) and vertical (red) respectively. Right-click on the horizontal and vertical keys as the name implies, and it will change the picture near the constraint line in the screen. For example, level the horizon (yellow). , Fuzheng Chimney (red), Straightening the roof (blue)
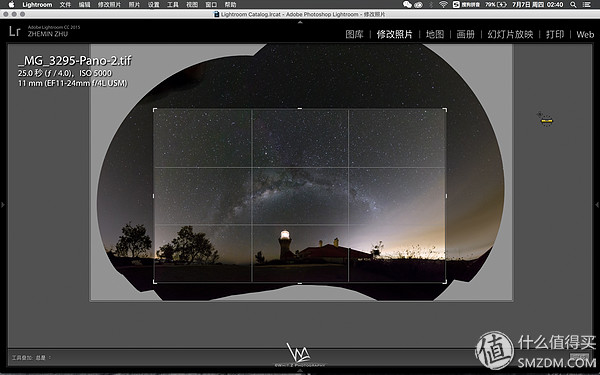
After all the work is done, it will be saved in PS, it will be saved back to Lr as Tiff format, then you can have a nice palette
Lightroom adjustment
Return to Lr first step first trim
Adjust the brush
1. Cover the entire sky and go for 100% to highlight the stars and the Milky Way
2. Darken the light pollution on the right hand side, do not distract from the Lord, lower the highlights but at the same time brighten the shadows
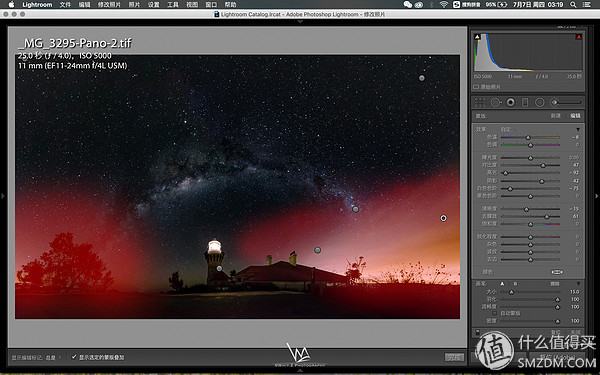
3. Brighten prospects and enhance landscape
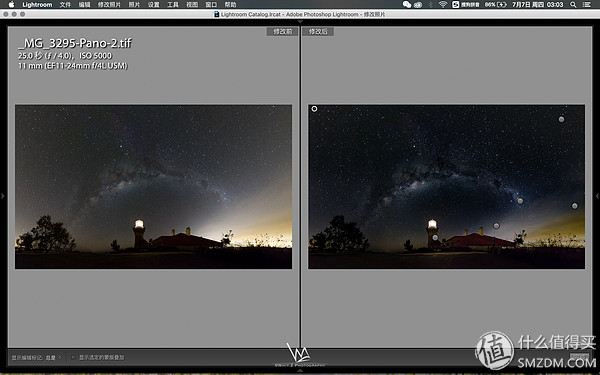
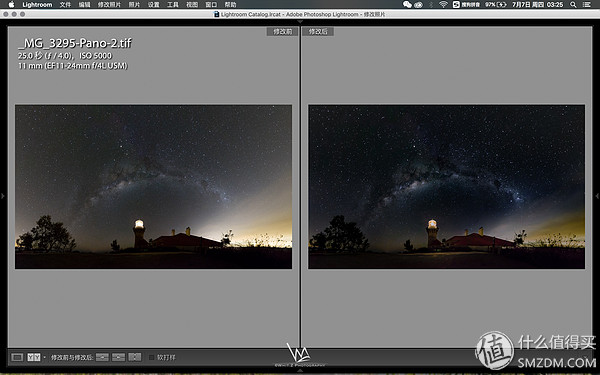
Before and after comparison, the Galaxy will be more conspicuous
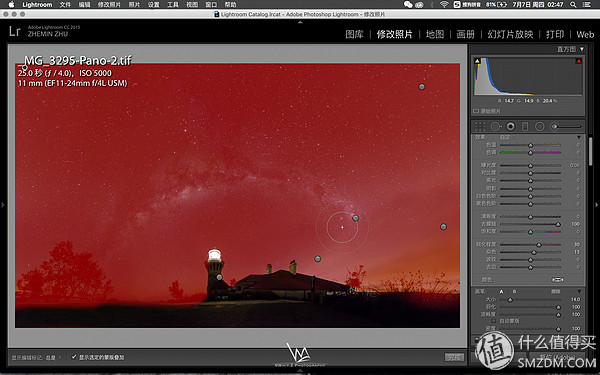
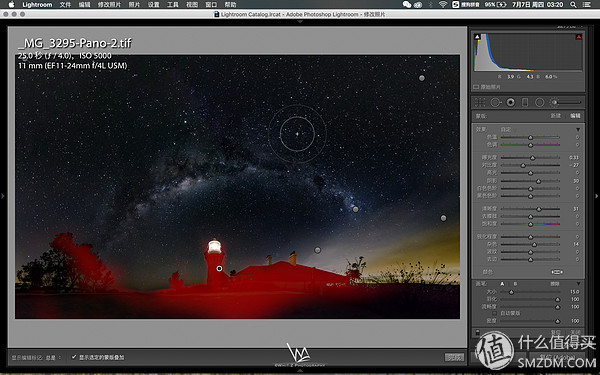
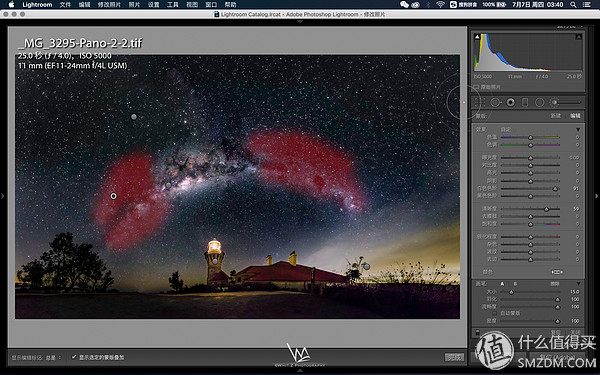
Radial filter
Reverse mask, darken lighthouse highlights, increase saturation, increase color
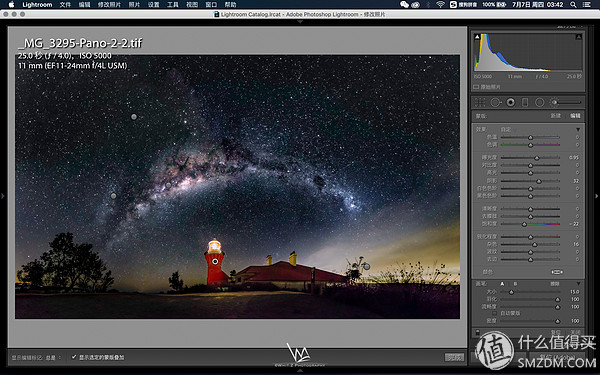
Reverse mask, brighten the scene

Before and after comparison, the original black scenery will be pulled back to increase the atmosphere
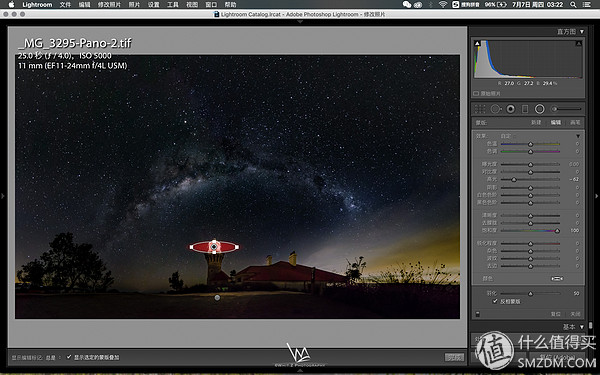
Final color
1. The center of the galactic palette, which is also used to adjust the brush, this step can be called to color the galactic, first lowering the contrast is equivalent to disguised brightening the galaxy, improving the highlights and white levels to make the galactic surrounding more obvious, because the Galaxy itself Some warm colors increase the saturation temperature while warming the Galaxy, and then select the foundation color in the color options to control the Galaxy so that it will not be too yellow

2. Galactic adjustment at the beginning and end of the year, increasing the white level and increasing the clarity at the same time, making the front and tail more visible
3. Further highlighting the main body of the lighthouse
4. The external panel increases the exposure and then increases the sharpness to enhance the screen outline
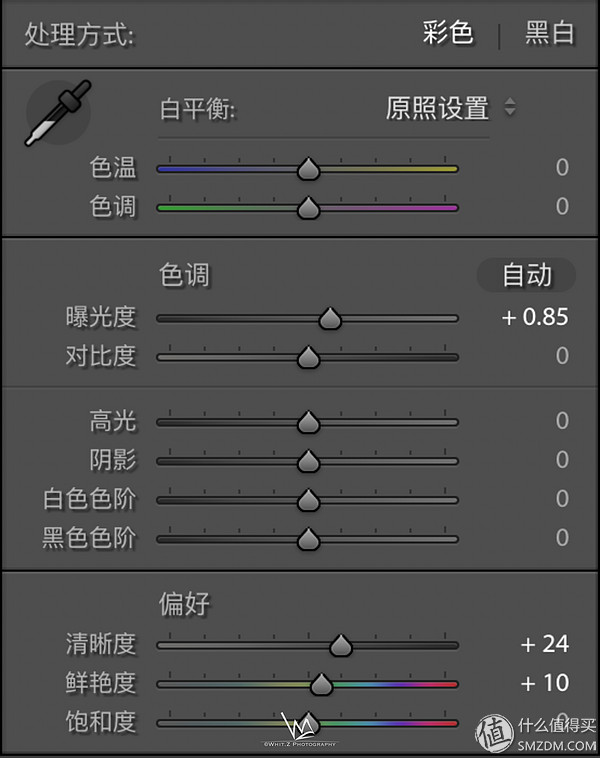
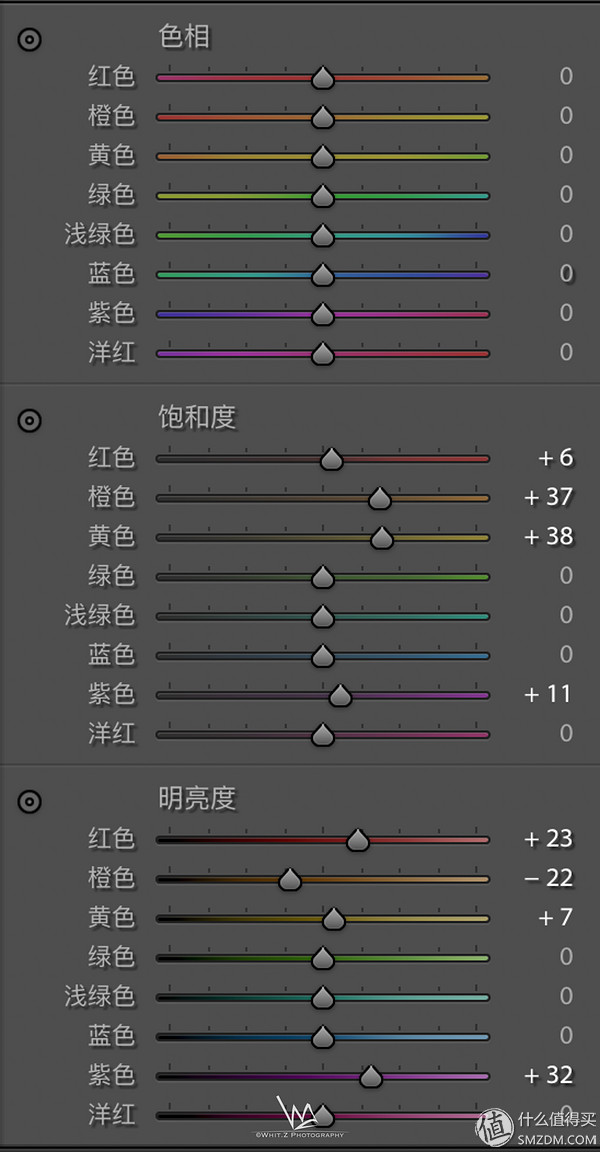
5. Tones the overall picture, increase the yellow orange saturation to highlight the lighthouse, increase the redness of the brightness, and brighten the roof
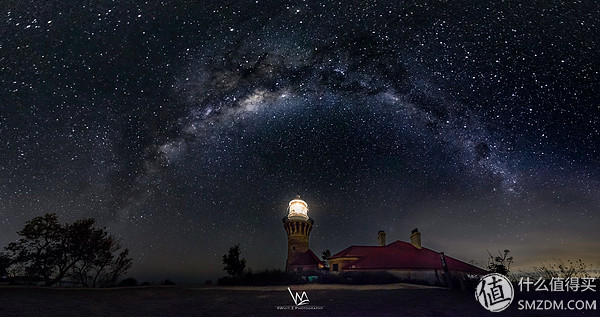
At this point, the coloring process is over. Look at the contrast before and after

Yoga Mat,Thick Yoga Mat,Yoga Mat Strap,Non Slip Yoga Mat
Cixi Mingsheng Rubber & Plastic Co.,Ltd. , https://www.popmat.com