
The I/O used in this article mainly has the following three parts.
I2C interface
UART interface
USB interface
The hardware peripherals that need to be used are as follows
Grove Digital Light Sensor
The UART to USB1.8v line mentioned above
Kernel customizationFirst we need to reconfigure the kernel to add our device drivers.
Recompile the kernel
Download our latest Android 5.1 version on the 96board website
The official kernel currently does not recognize our I2C light sensor by default, so we need to recompile and add drivers in the kernel.
First download the Linux Android BSP package on the official website, clone it and compile it.
Compile kernel instructions
First switch to the source directory
Go to the build directory
Lunch msm8916_64-userdebug
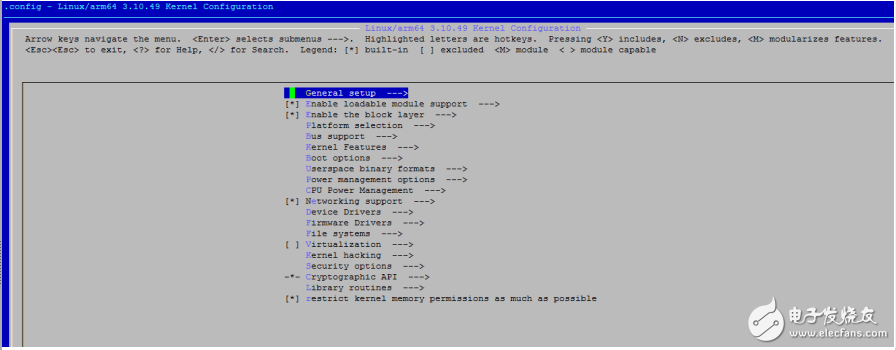
Start kernel config: execute the command
Make-j8 kernelconfig
Note: j8 is the number of computer cores, depending on the configuration of the computer we are compiling
Next we can see the interface shown below in the interface:
Select TAOS TSL2560, TSL2562 and TSL2563 ambient light sensor in the kernel compilation options.
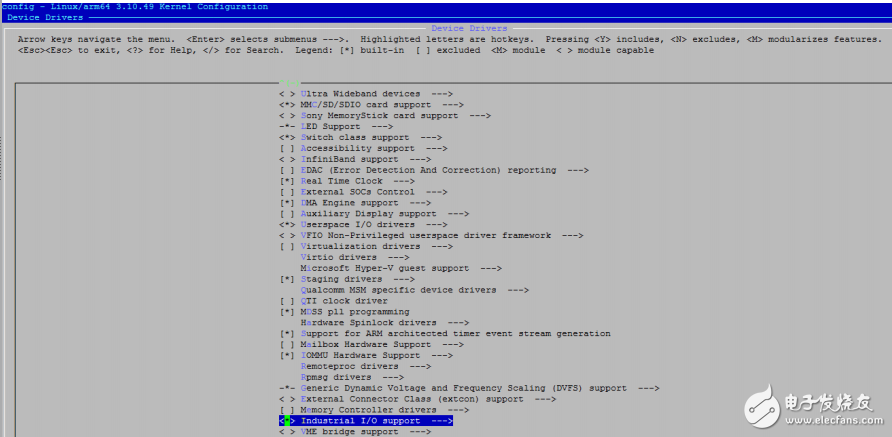
Save and exit from kernel configmenu

If we add a new driver to the device, we need to make changes in the Makefile and add the correct path to the Kconfig file in kernel/driovers to trace back to the correct device driver Kconfig file. This step can add a new entry in the kernel config, so you can choose in the config interface, the driver files need to be added to the same directory, just like the Kconfig file and the Makefile.
Open /kernel/arch/amd64/boot/dts/qcom/apq8016-sb.dtsi and add the following code
&soc {
I2c@78b6000 {
Tsl2561@29 { /* Grove digital light sensor */
compaTIble = "taos,tsl2561";
Reg = <0x29>;
}
Save the file and run the following command:
Make –j8 booTImage
Boot.img will be at /out/target/product/msm8916_64/boot.img
The 78b6000 is the address of the BLSP, which is used to configure I2C communication. We connect this sensor to the I2C-0 device.
Burn the kernel to the DragonBoard 410c
Press and hold the button volume down button while powering up, we can set 410c to fastboot mode. Once in fastboot mode, we can use the command line to burn boot.img to 410c.
Fastboot flash boot boot.img
Connect the J8 pin on the DragonBoard 410c to the PCA9306 sensor
Connect as follows:
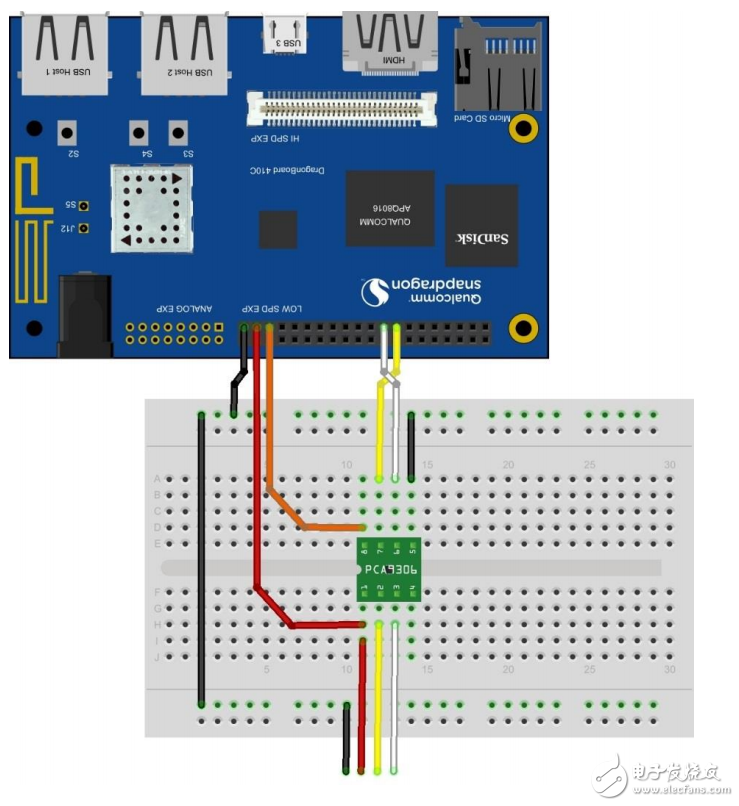
PIN #37 VREF2 of PCA9306 VCC of grove light sensor
PIN #39 "-"on Bread Board
PIN #35 VREF1 of PCA9306
PIN #15 (I2C0_SCL) SCL1 of PCA9306
PIN #17 (I2C0_SDA) SDA1 of PCA9306
PCA9306 GND to “-†on Bread Board
VREF2 of PCA9306 VCC of Digital Light Sensor
SCL2 of PCA9306 SCL of Digital Light Sensor
SDA2 of PCA9306 SDA of Digital Light Sensor
"-" from Bread Board GND of Digital Light Senso
Connect UART to USB cable to your computer
PIN #11 UART1_TX
PIN #13 UART1_RX
PIN #1 GND
Refer to my article to connect
Test hardwareAccording to the above operation, we can already detect the device after startup.
First find the following information in the trace of the kernel:
Tsl2563 0-0029: model 5, rev. 0
If you don't have a USB to UART, we can log in via ADB.
Adb shell
Su
Dmesg
As the shell starts, we go to the directory /sys/bus/i2c/devices/i2c-0
We can see the device 0-0029, 0x29 represents the sensor's I2C address
Cd /sys/bus/i2c/devices/i2c-0/0-0029/iio:device0
Cat in_illuminance0_input
Next we can see an integer value as an output, constantly occluding or illuminating the sensor, and executing the cat in_illuminance0_input command, we can see a constantly changing optical flow value.
Thunderbolt 3 Cables,Thunderbolt 3 Cable,Fast Charging Thunderbolt 3 Cables,Usb C To Type-C Data Cable
Dongguan Pinji Electronic Technology Limited , https://www.iquaxusb4cable.com