Recently, when two or three friends newly purchased a Mac and asked me about the experience, they found that the entry questions asked by the friends who had no idea about the Mac were almost similar. They all covered basic contents such as Mac installation software and folder management. In order to get a zero-threshold threshold for friends who have not contacted the Mac operating system, this article was born - the zero-threshold contact with macOS.
Note: The Mac is what we often call Apple Computer. Its operating system is macOS.
Different boot
After you buy back the Mac, you can find that you cannot directly enter the main interface of the system. Instead, the Mac's own setup assistant guides you to the computer settings: setting language, connecting to WiFi, creating a personal account, setting up TouchID, enabling Siri, etc. You can also guide you to Another computer's manuscripts and multimedia files are transferred to the new MacBook. Newcomers at this stage can follow the guideline and complete it.
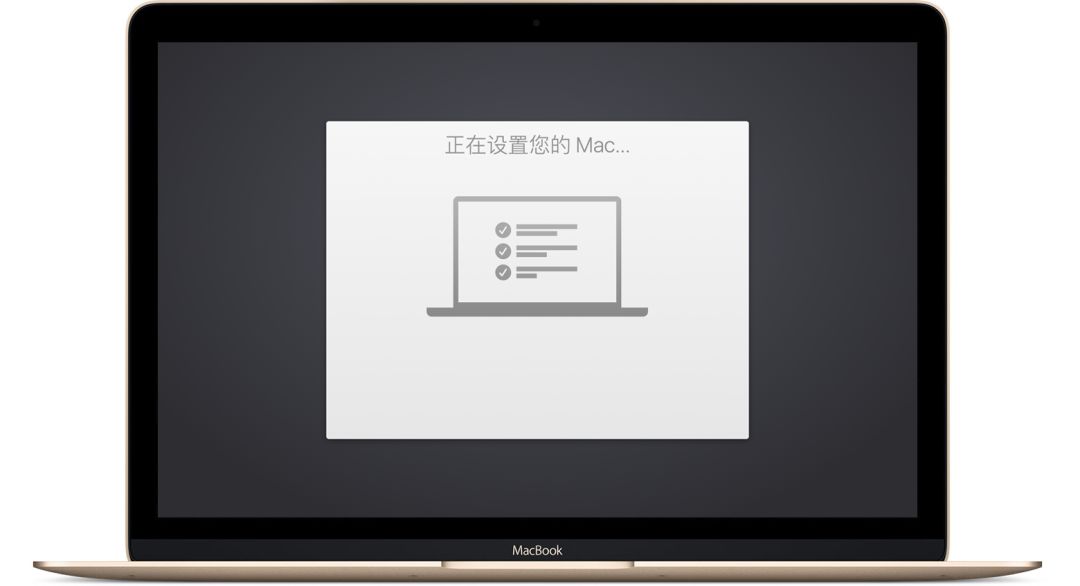
When the above settings are completed, we will boot into the Mac's main interface.
Minimalist desktop
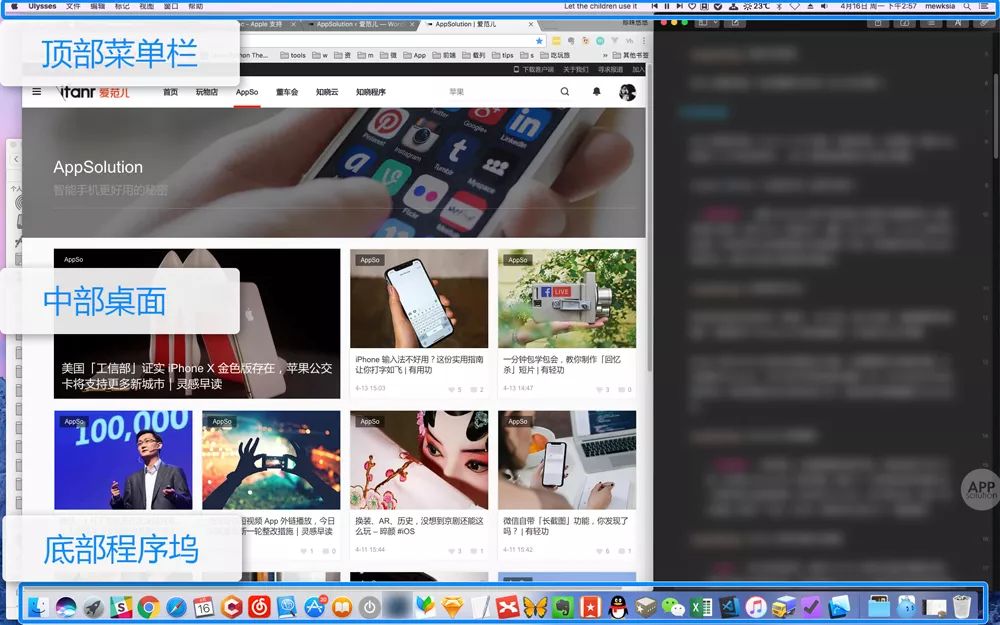
Mac's main screen is extremely simple, divided into upper, middle, and lower 3 modules: the top menu bar, the middle desktop, and the bottom Dock program dock. These three modules carry all our daily needs.
1. Top menu bar
Users familiar with Windows know that there is a row of software to operate the main menu on top of different software. For example, Word is just a file, edit, insert, etc. In the macOS system, you will find that the main menu of all the software is simplified to the only area of ​​the desktop. , the menu bar with an apple logo on top. The software main menu occupies the top left part.

On the right side, there are fixed icons such as clock, notification bar, WiFi status, input method switching, volume adjustment, and other shortcut icons. The function is equivalent to the notification window in the lower right corner of Windows. Its function can be adjusted by itself.
However, Mac does not automatically fold these small icons like Windows. Instead, it needs software to assist with folding. Bartender is recommended here. It can fold uncommon icons together and customize the time of their appearance. For example, if there is notification, The main menu appears for 5 seconds and is hidden in Bartender when there is no news.

2. Middle desktop
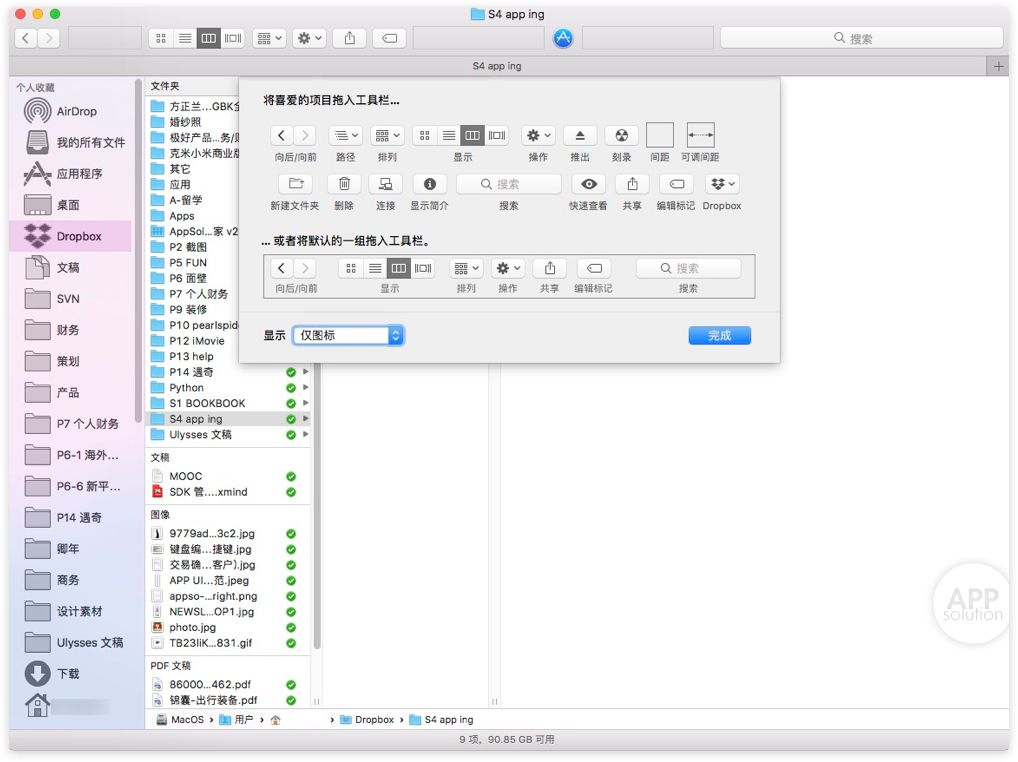
The empty desktop looks very refreshing. Some users may not be accustomed to it. They will ask where is the "My Computer" in Windows? In fact, on the left side of the program dock, there is an icon with a cute little face. We call it the Finder. Therefore, "My Computer" is equivalent to the "Visit" folder. What is the program dock? Continue next.
3. Dock program dock
The program dock is the area where the user interacts with the macOS system most frequently. The program dock is equivalent to the quick launch bar. We are familiar with the Windows system will put the commonly used icons on the desktop, the software being used is placed on the bottom of the taskbar, and the program docking set of these two functions in one, you can drag the commonly used software or documents placed on the program dock turn on.

The file can be used like this
Because Mac computers are different from the hard disk partitions of Windows systems, Windows is generally divided into system disk C and D disk and E disk. Normally, Mac has only one Solid State Disk, and the system and files are stored in this disk ( Of course, the macOS system also supports partitioning. Friends who want to implement partitioning can search for tutorials on their own.
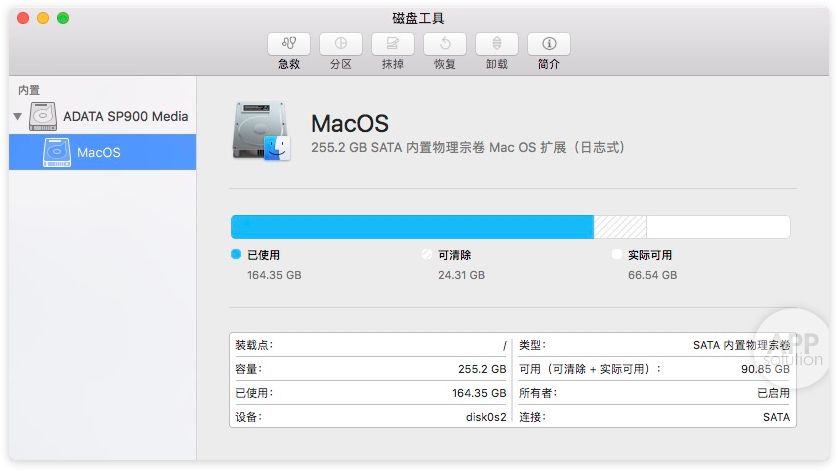
In the case of a Mac with only one disk, all our files are in the Finder folder, which is also the Mac's home base. Looks like a blue smiley visit will be automatically divided into the desktop, applications, videos, music , Documents, Images, Downloads These are the basic folders. The use of folders is no different from Windows, but it is important to point out that the features that are different from Windows are its unique features: folder arrangement and folder tags/tags.
1. Folder Arrangement: Icons, Lists, Columns, and Cover Flow
Icons and lists this we are very common, grow like this:
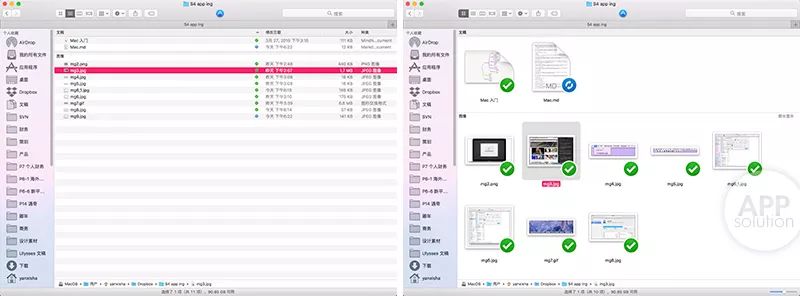
Columns are the top and bottom of the folder displayed, simple and clear:
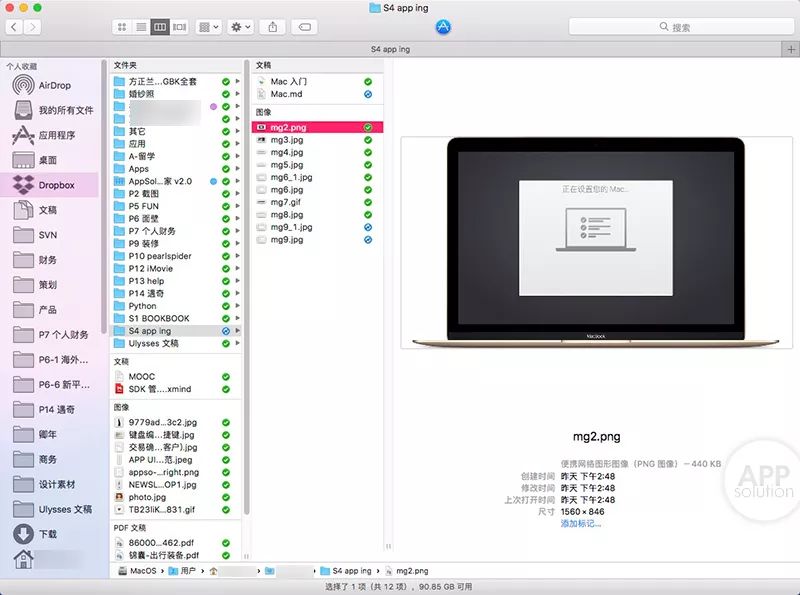
We can use the arrow keys to move up and down so that we can quickly see what the document contains. Just look at the file name and don't know what the file is. Tap the space to see the preview:
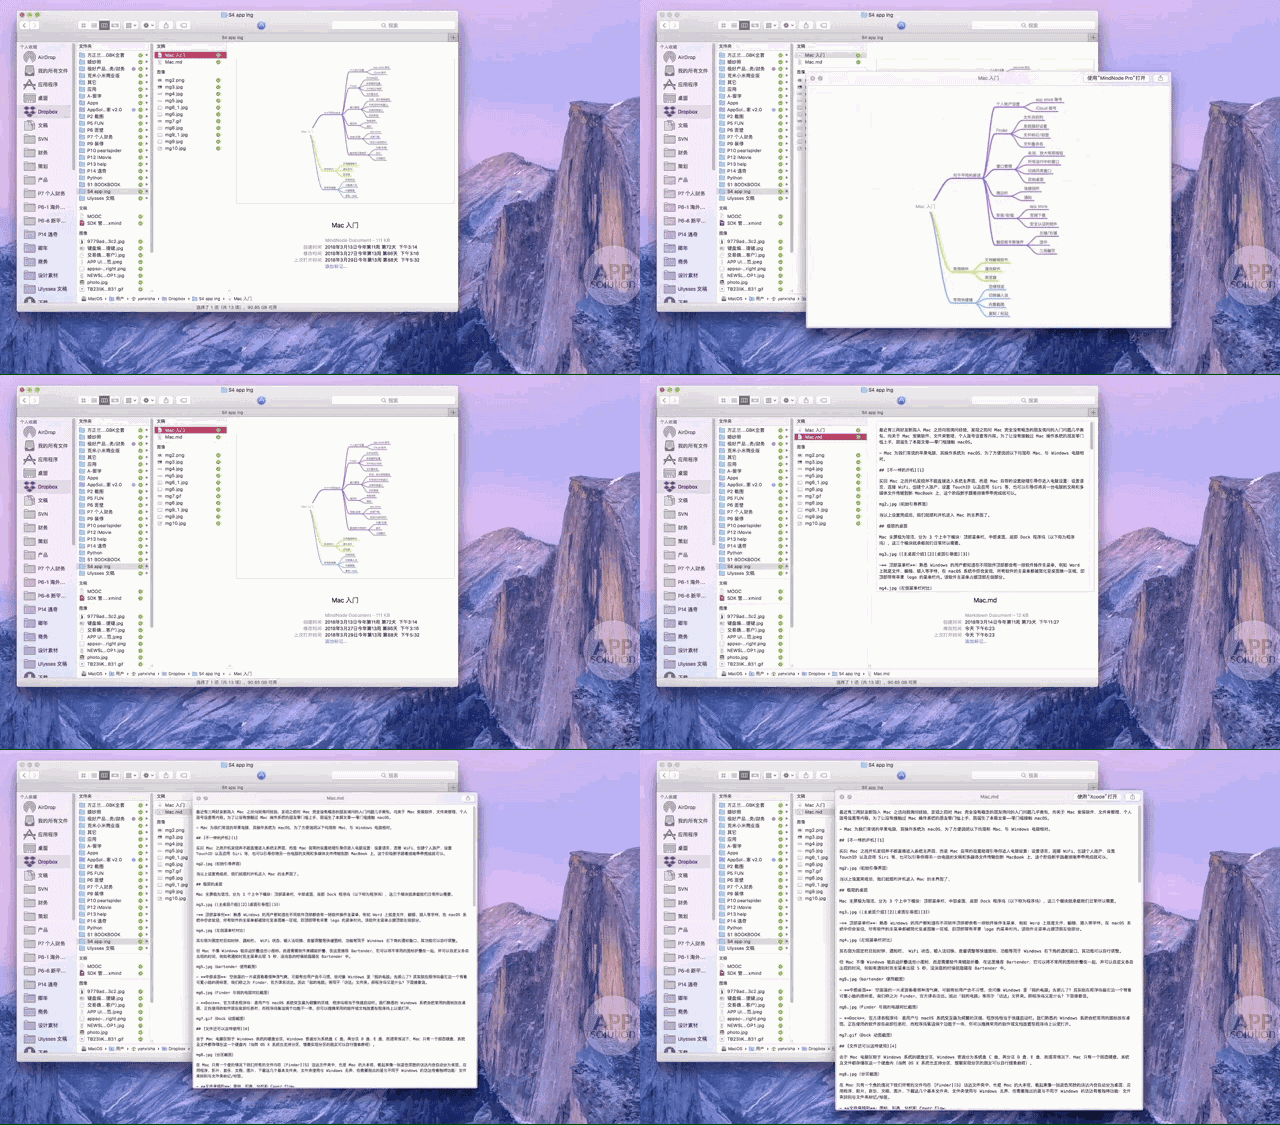
This feature is called a quick preview, any document in the Mac can tap the space to use a quick preview, tap the space to preview the file types include pictures, videos, music, documents (including Word, Excel, PPT, PDF) And other formats. Even if you do not use the quick preview, there is a preview of the small window on the right side of the visit. The file name, format, file creation time, file modification time, and file size are marked.
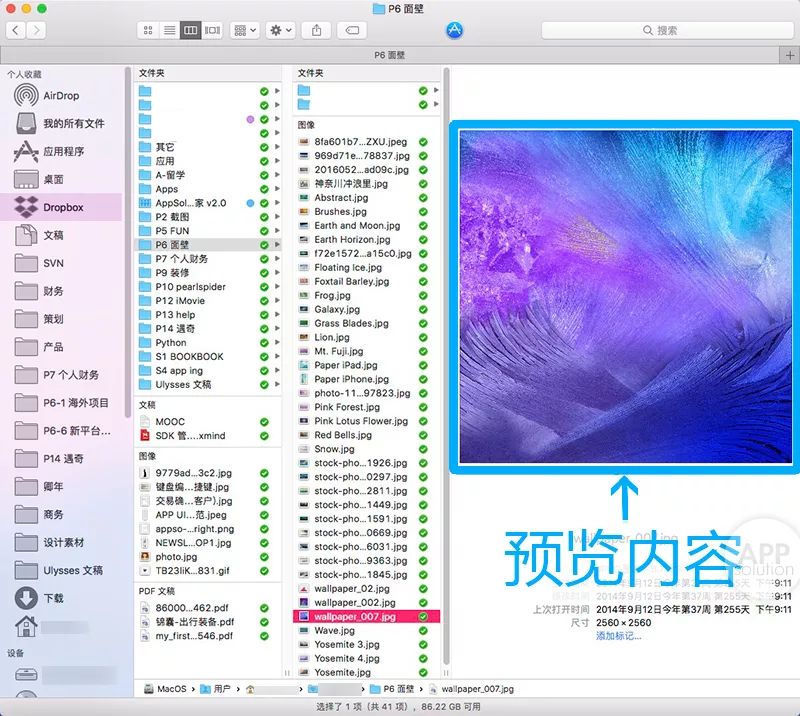
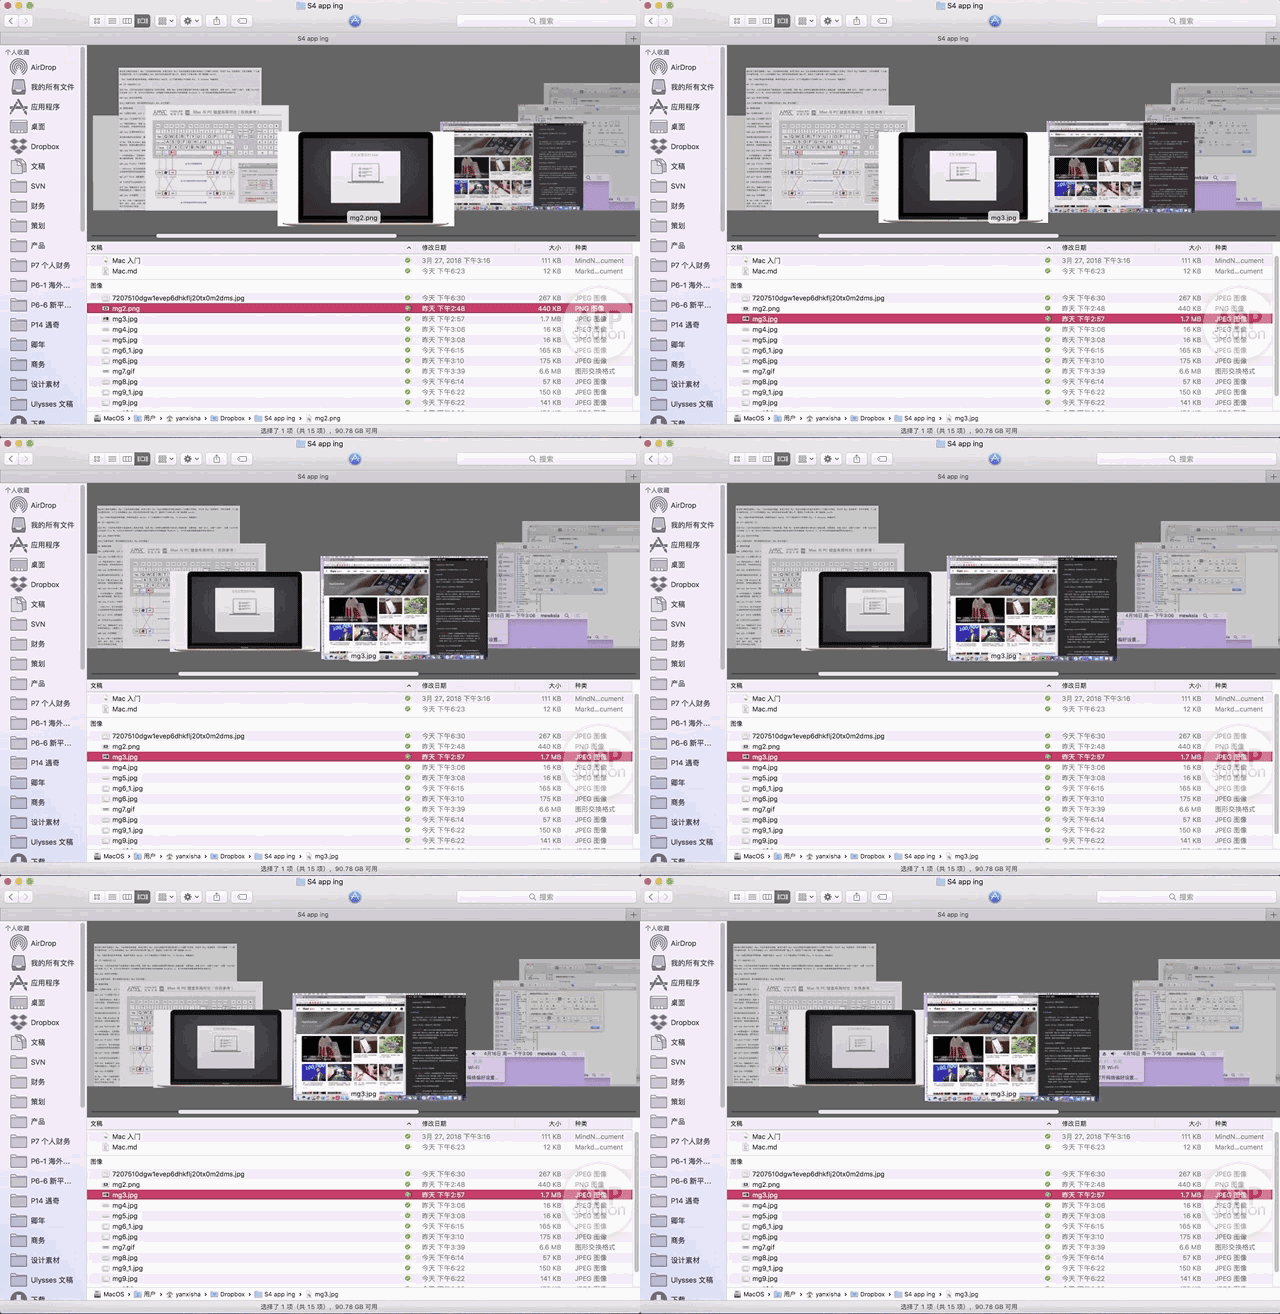
Another Cover Flow mode is also suitable for previewing files:
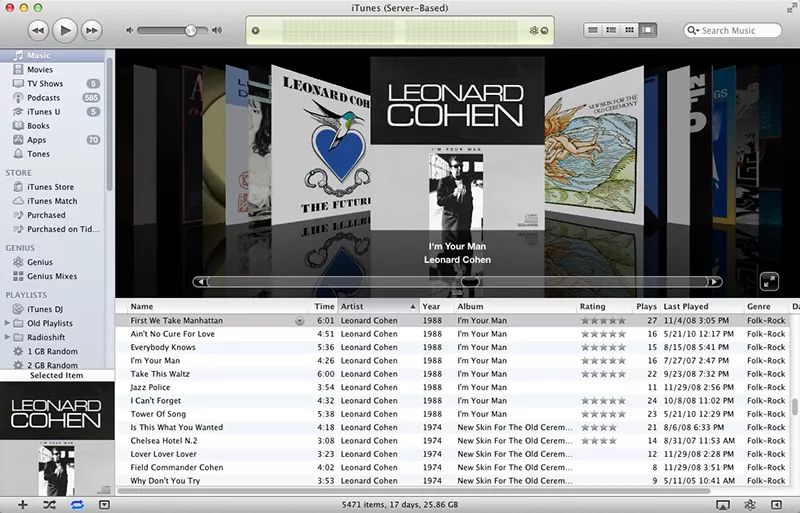
The earliest model was created by Jonathan del Strother, developer of the Macintosh (developed by Apple Computer in 1984). It appeared as a must-have program for macOS from 2005 to 2006 because it visualized the user in an intuitive and sensuous way. A record collection, highly adopted and evaluated by users, was acquired by Apple and used in iTunes. Until the release of iTunes 11, the Cover Flow mode has been removed from iTunes, and it must be said that its display is still very good. After seeing the record album of this scene, who would not have met with the enthusiasm for collecting?
Now we see that the Cover Flow mode is not limited to iTunes, but it is free to preview the file. Occasionally using this mode to look through photos and albums feels good.
2. Folder Tag/Label: Access to the bottom left sidebar shows many round colored markers for assisted file classification
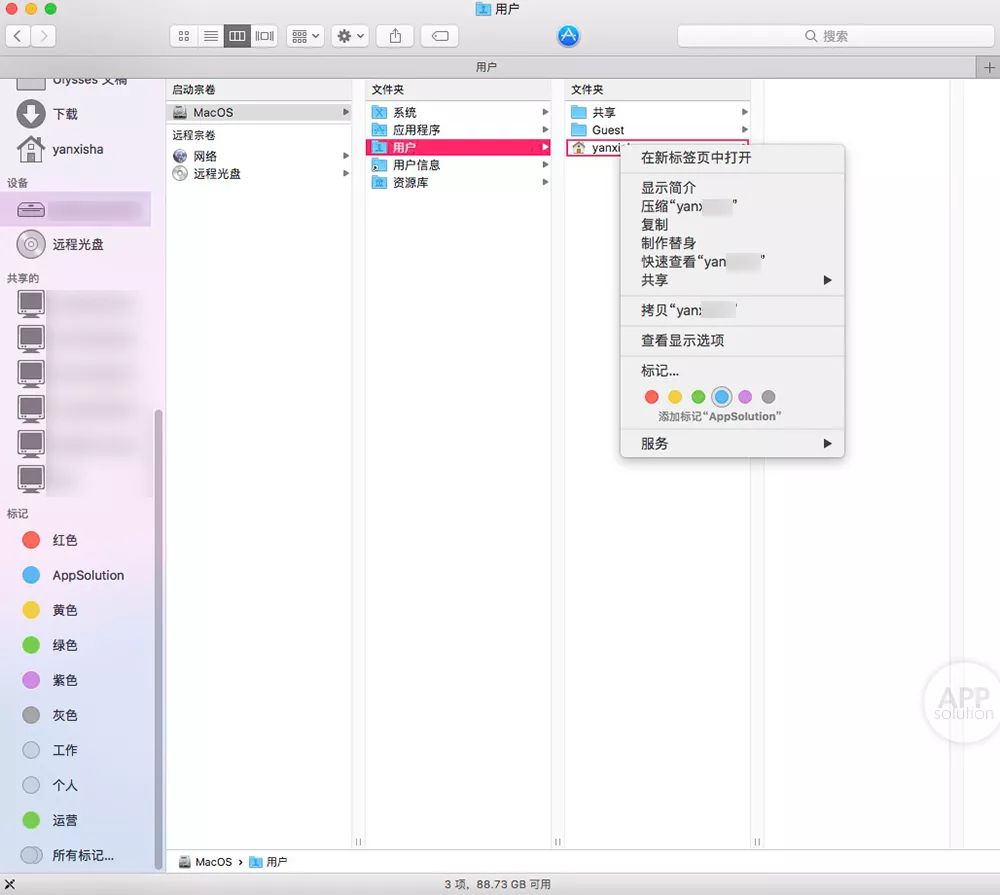
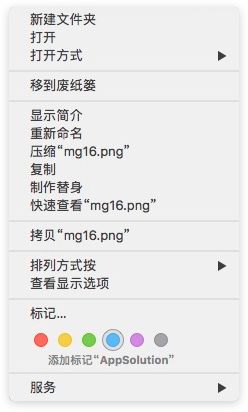
If the folder category is vertical display logic, then the tags are the horizontal organizers across these logics. You can right-click on any file or folder in the computer to mark the colored tags. These tags can be renamed.
Commonly used tags can be set as urgent, pending, and pending dimensions, and can also be set as life dimensions such as look-ahead, purchase information, etc., and can also be set to such dimensions as school, family, travel, and work.
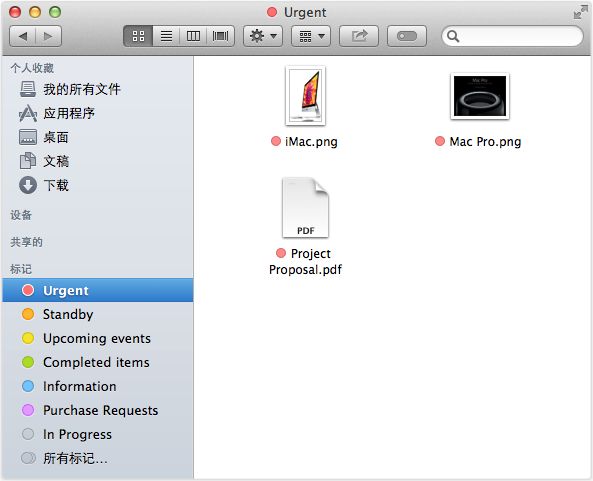
The same document supports the setting of multiple labels. Two of the commonly used ones are the right key and then the label. The second is the click of the upper setting icon.
This manages the window
1. Close, zoom in and other common buttons in the upper left corner
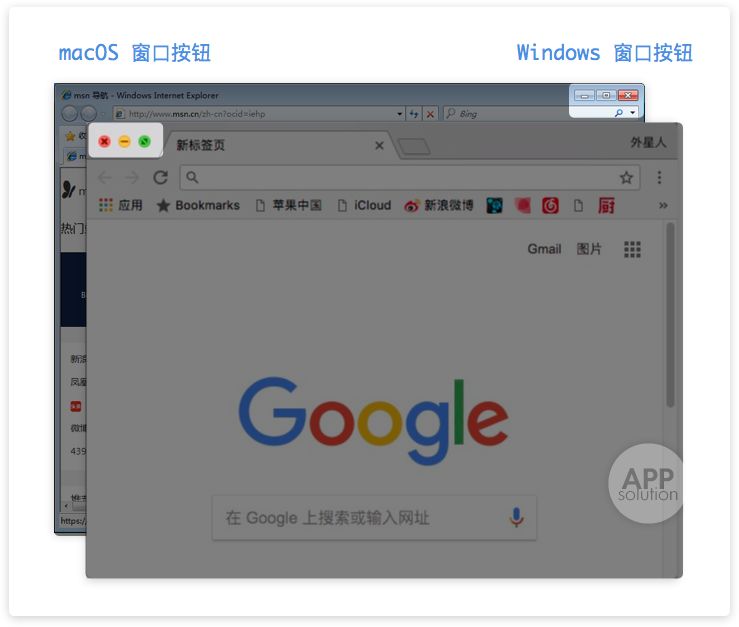
Mac's desktop window, its full-screen, minimized, and close buttons, in contrast to Windows, is in the upper left corner.
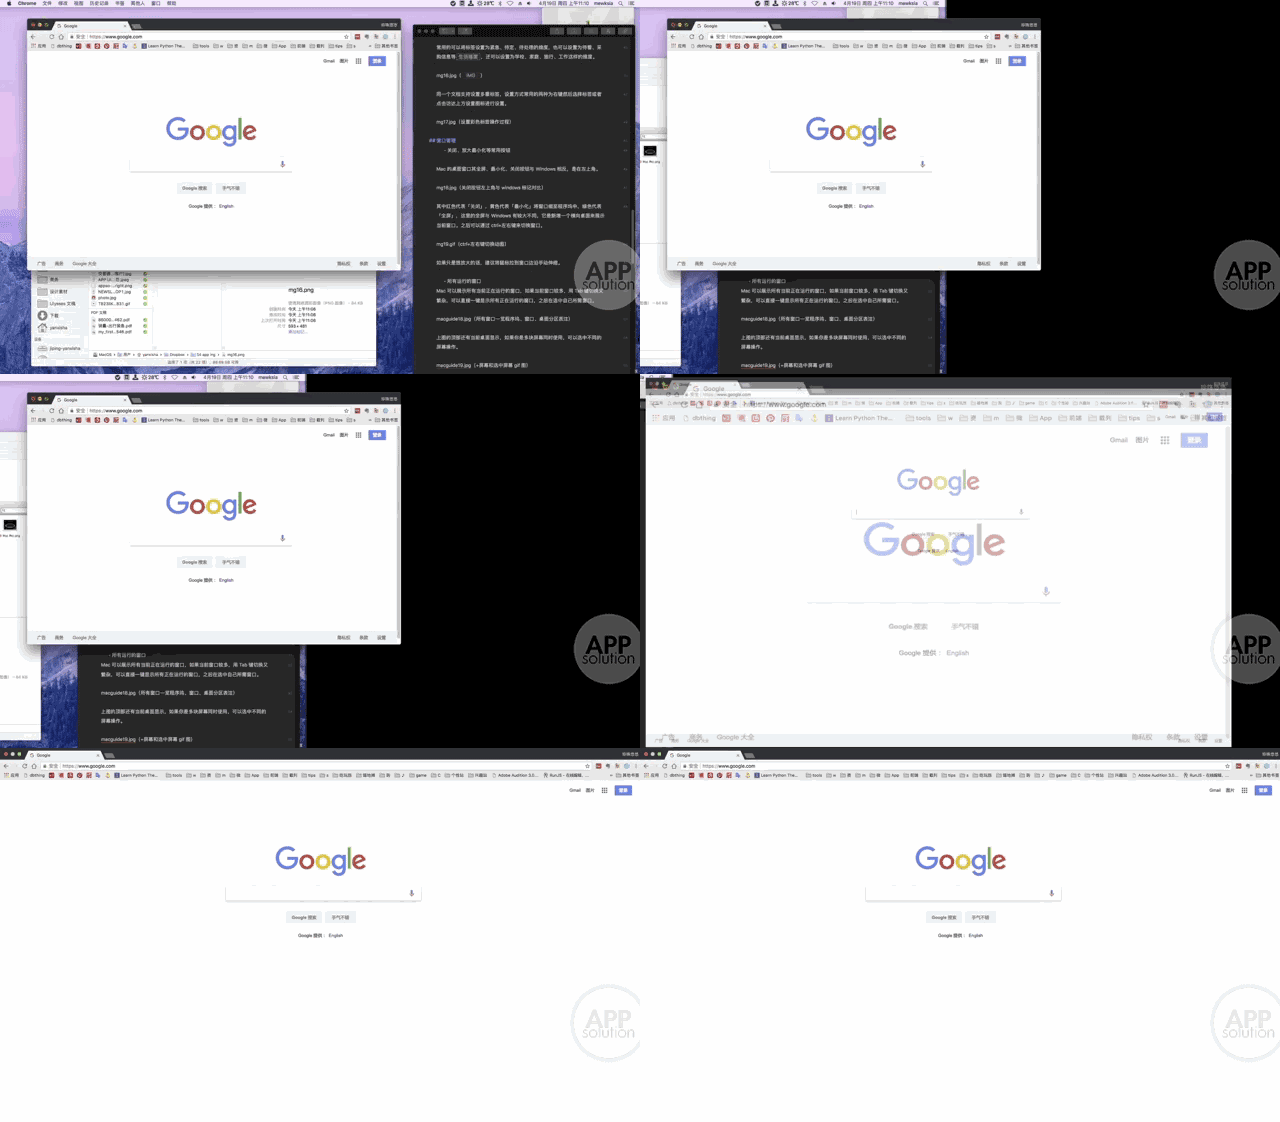
Red means "close", yellow means "minimize" to shrink the window to the program dock, and green means "full screen". The full screen here is quite different from Windows. It is to add a horizontal desktop to display the current window, as follows Picture shows. After that, you can switch the window by using the ctrl+ left and right keys.
If you just want to zoom in, it is recommended to pull the mouse to the edge of the window to manually zoom.

2. All running windows
Mac can display all currently running windows. If there are many windows, use the Tab key to switch them. You can display all running windows in one click, and then select your current desired window.
At the top of the figure above is the current desktop display. If you are using multiple screens at the same time, you can select different screen operations.
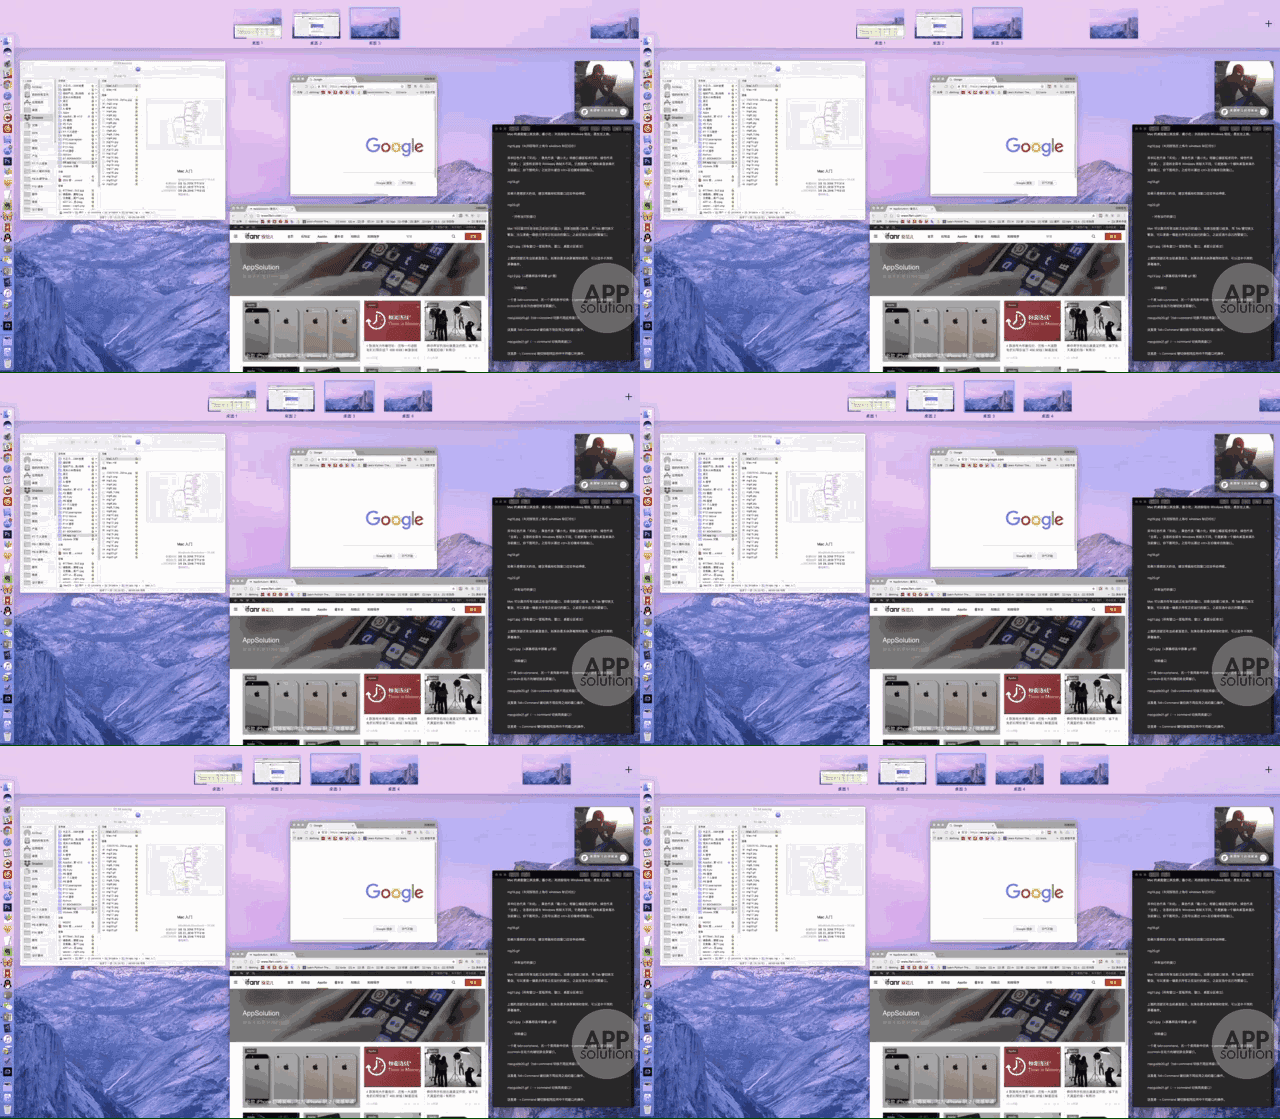
3. Switch window
One is tab + command, and the other is the same as switching between + command, as well as the above mentioned control + left and right arrow keys to switch the full screen window.
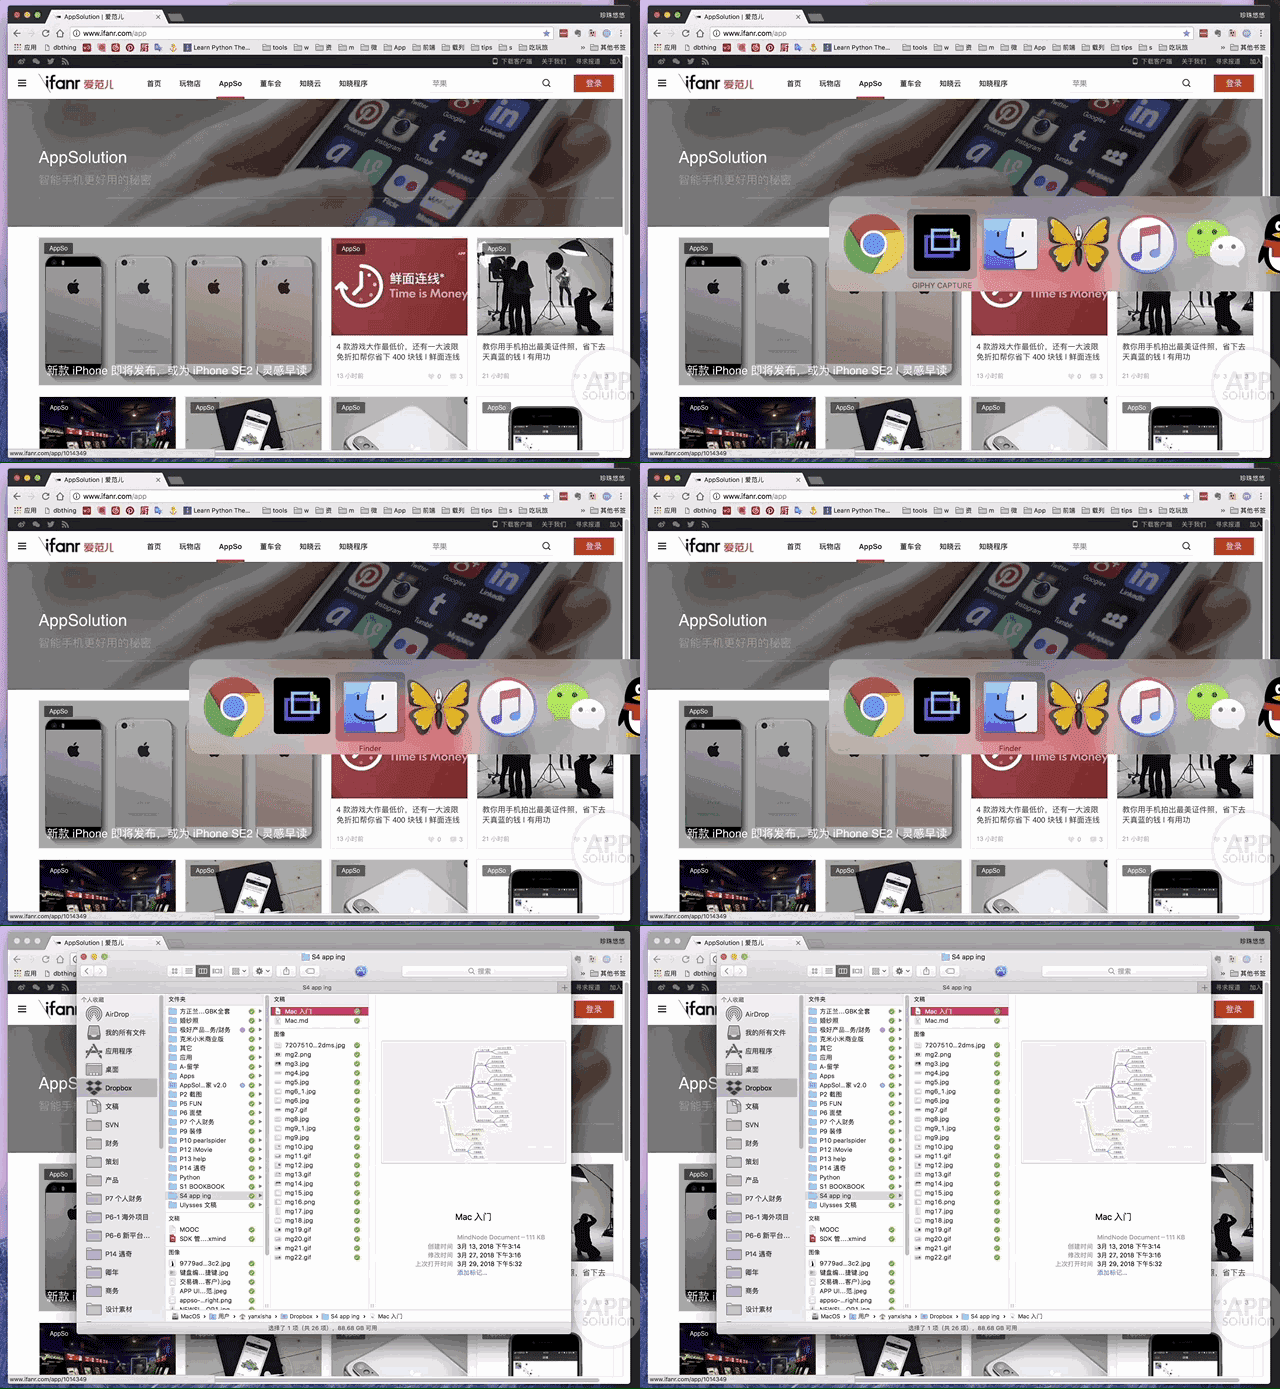
Here is the tab + Command key to switch window operations between different applications.
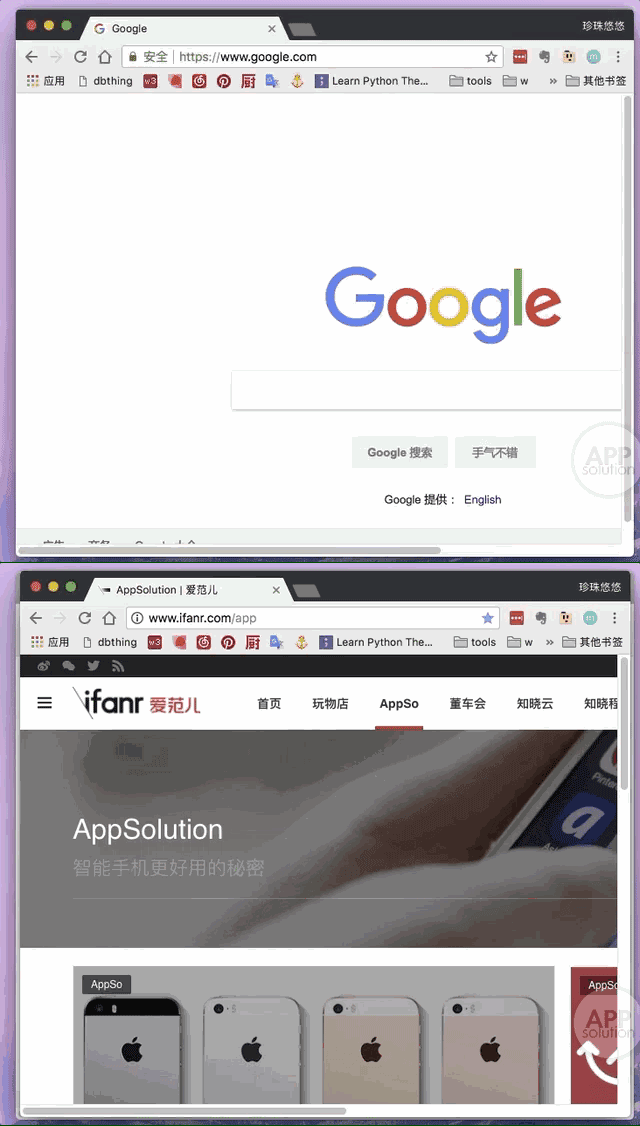
Here is the + Command key to switch between different windows in the same application.
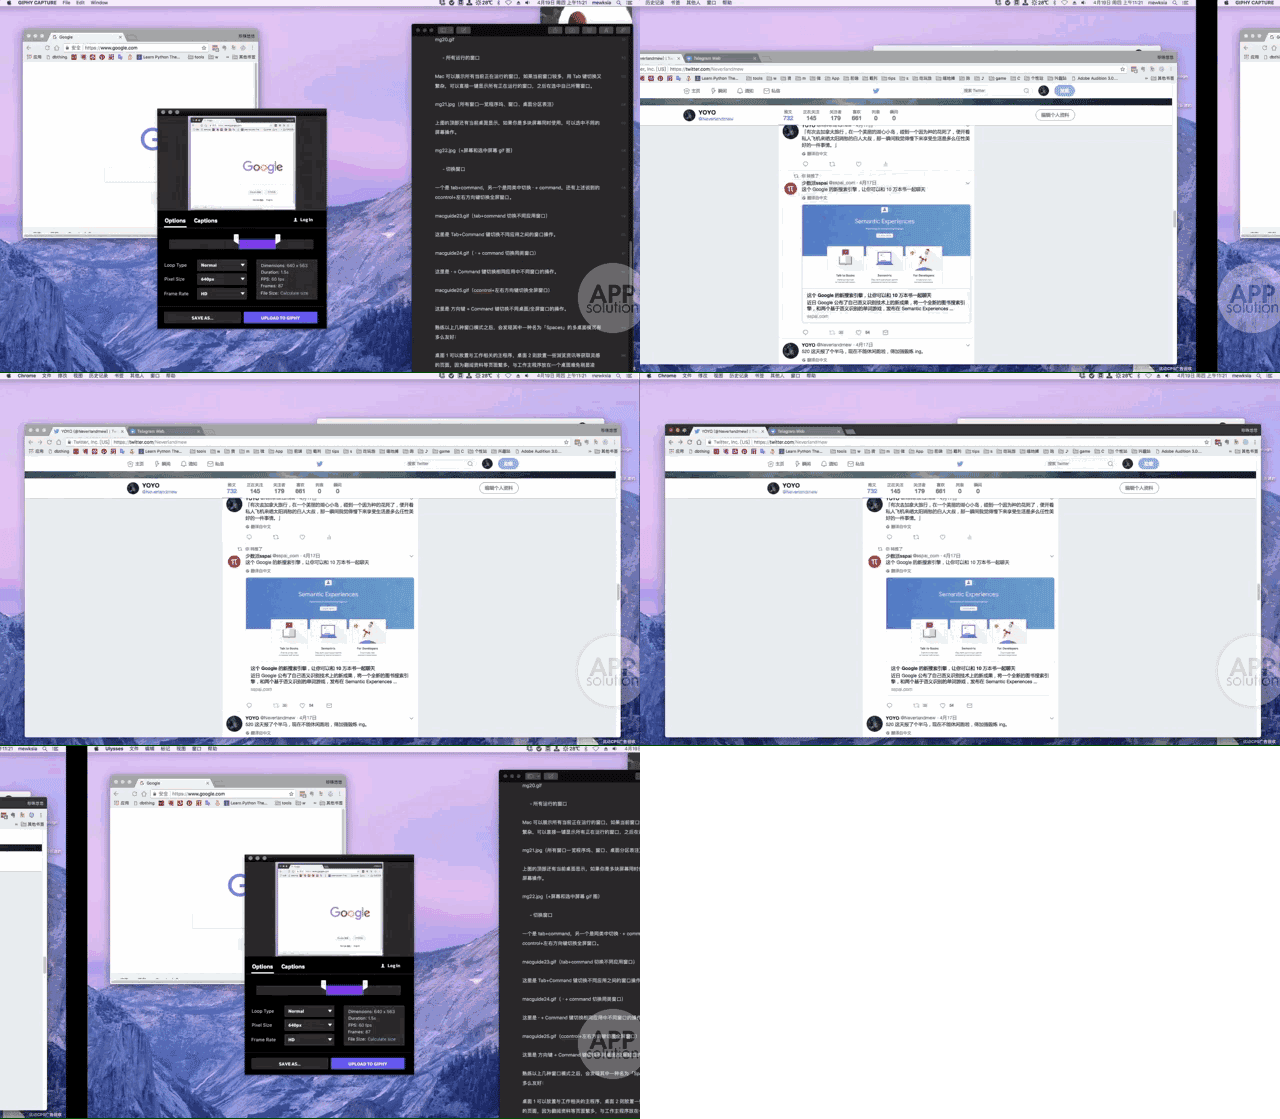
Here is the arrow key + Command key to switch between different desktop/full screen windows.
After familiarizing yourself with the above several window modes, you will find how friendly one of the multiple desktop modes named "Spaces" is:
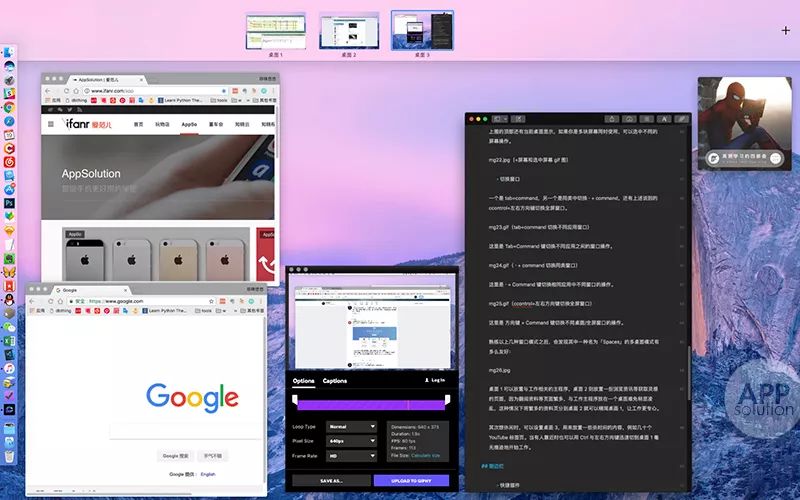
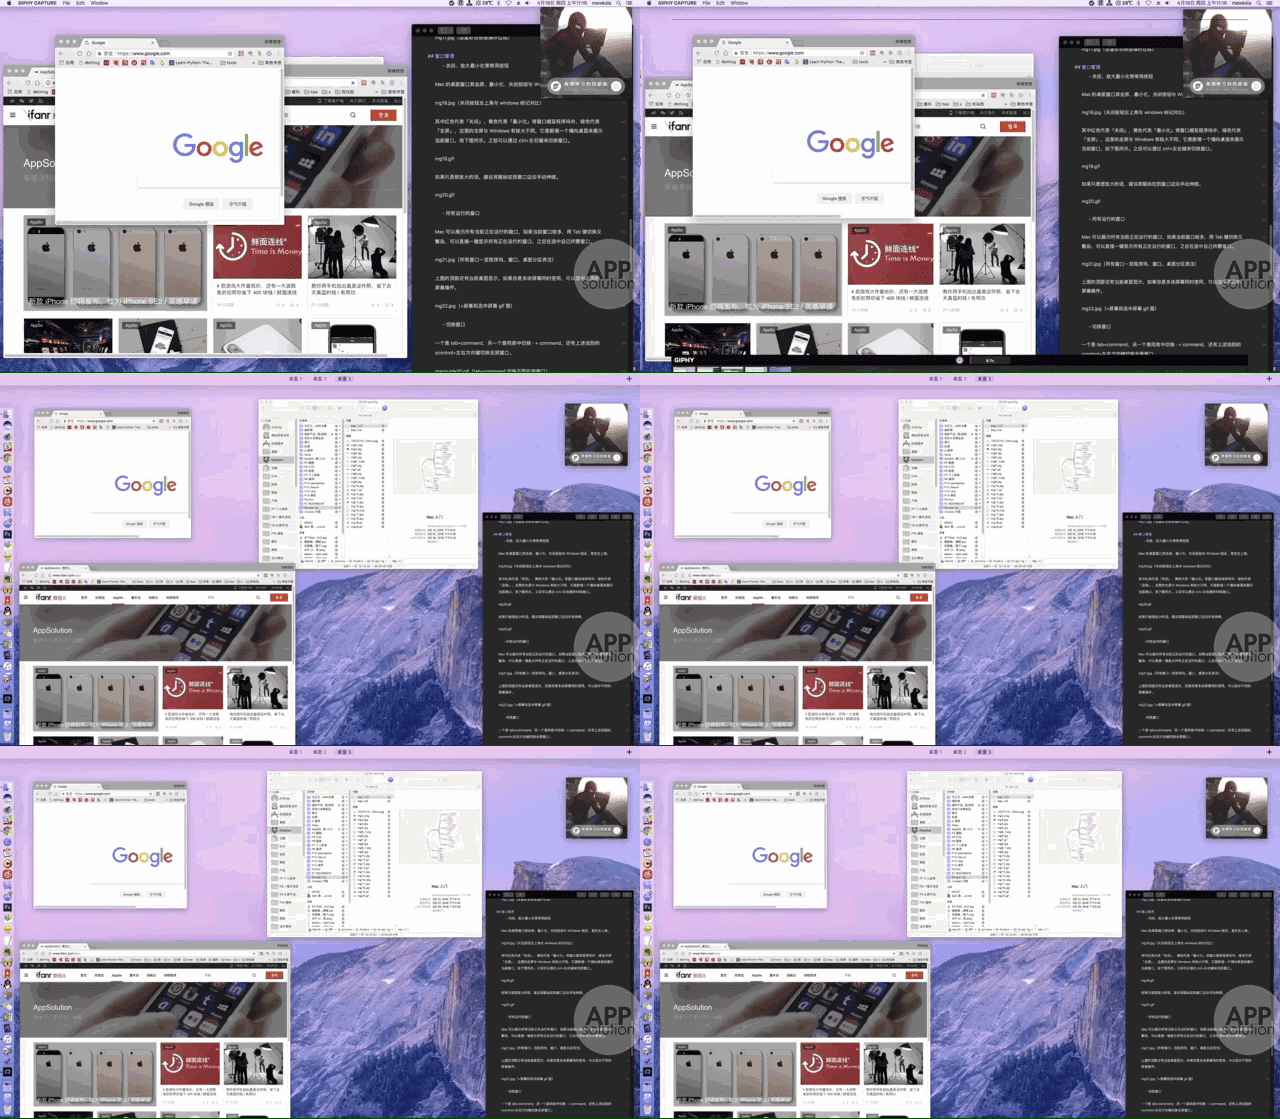
Desktop 1 can be used to place work-related main programs, and Desktop 2 is used to store inspirational pages such as browsing information. Because there are so many pages to scroll through, it is a bit messy to place the main work program on a desktop. In this case, there will be many The data page is divided into the desktop 2 can be streamlined desktop 1, to work more focused.
Next time you want to relax, you can set up the desktop 3 to place some time-killing content, such as dozens of YouTube tabs. When someone approaches, you can use the control and left and right arrow keys to quickly cut to the desktop 1 and start working without any trace.
Lightweight sidebar
Quick plug-in
The Mac is equipped with the same Quick Plug-in Center as the iPhone, which is the same as using the iPhone. Common plug-ins for the weather, calendar, calculator, additional custom plug-ins for the use of the editor.
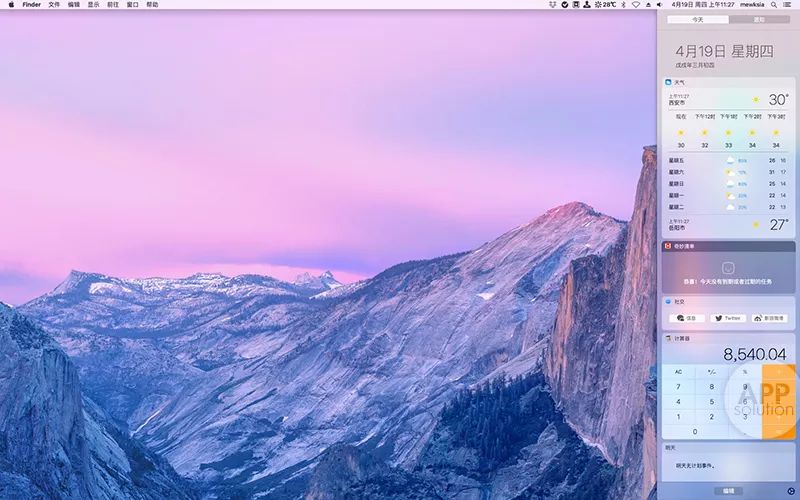
2. Notification Center
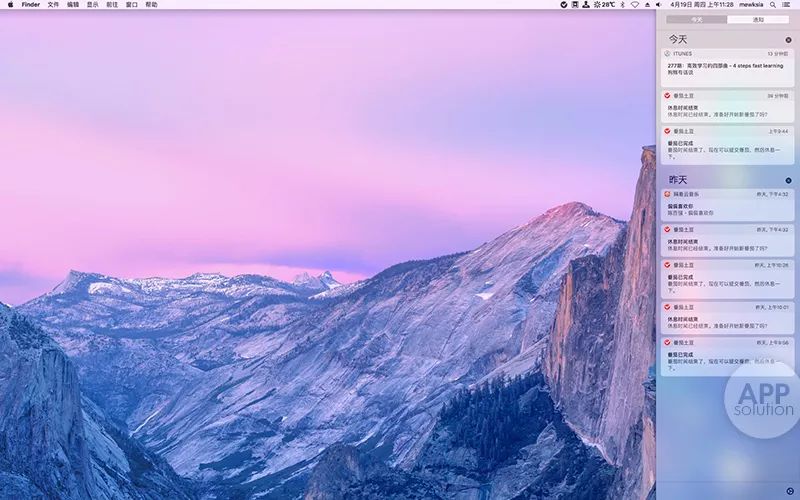
The notification center module and the shortcut plug in the same position. In the tab that appears after clicking in the upper right corner of the Mac, the Notification Center displays a prompt in the upper right corner of the screen without interrupting the user's current operation.
The notification hint style can choose the following three modes:
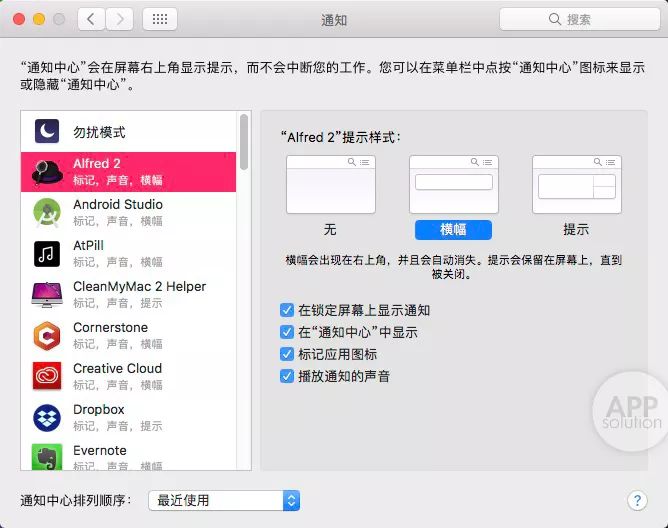
no
Banners
prompt
The figure below shows the notification banner effect.

The basic operating instructions of the macOS system have come to an end. Next we need to be familiar with how to use content outside the desktop - how to install and uninstall the software.
How to install and uninstall applications?
Users who have used the iPhone know that we need to use the App Store to install the required applications, and so on the Mac. After opening the App Store in the program dock to find the desired application for download, the software downloaded by the Mac App Store will be installed directly on the system as it is on the iOS mobile phone system. After installation, the application will appear in the application module.
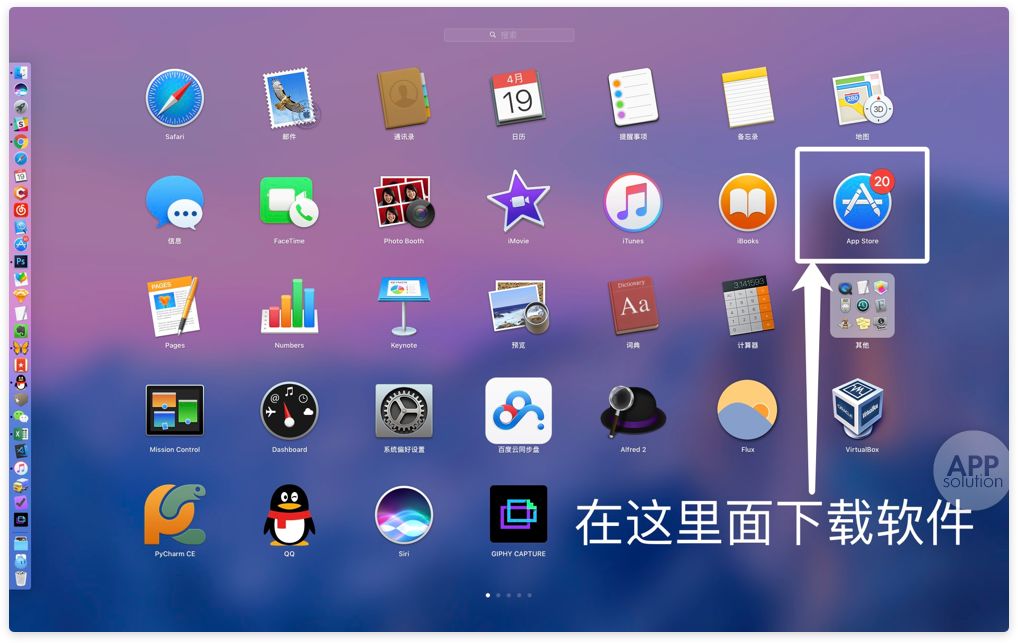
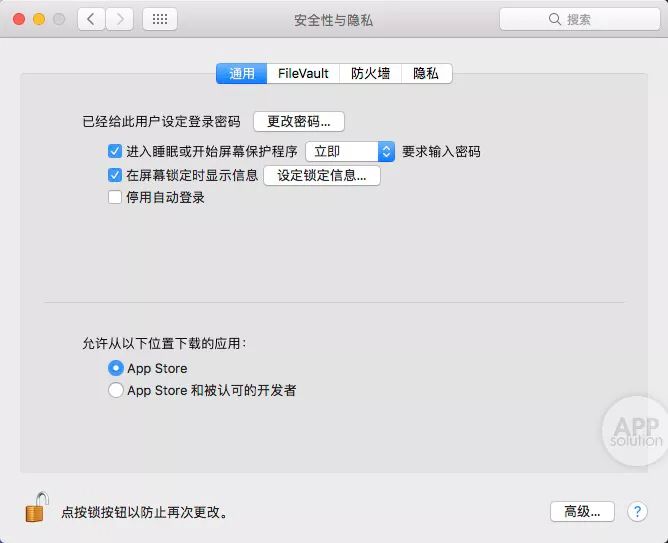
There is also an exception to the need to open the security restrictions when installing software from the product's official website or non-App Store. In the “Security and Privacy†column of the “System Settingsâ€, check the following items as appropriate:
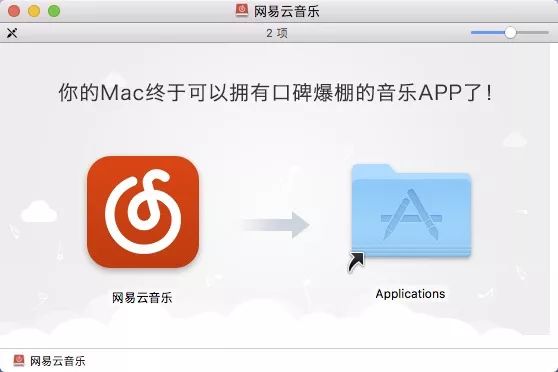
The installation file name suffix for Windows is exe, and the corresponding Mac installation file name suffix may be dmg or pkg. Since these are two different systems, the installation files cannot be used with each other. After downloading the third-party installation files, the installation requires a few simple steps:
Double-click the .dmg installation file
According to the operation of the installation process
Drag the installed app to the application folder
Slide to a touchpad gesture
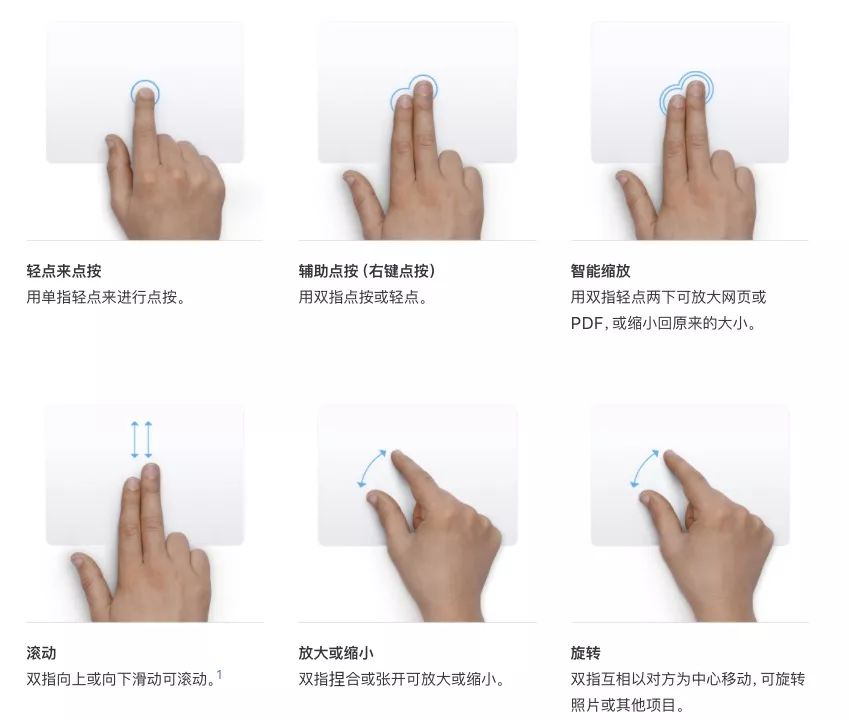
Mac's touchpad will become very easy to use and save when you are accustomed to it. In general, the touchpad has no other function than moving the cursor, but the Mac's touchpad can be clicked anywhere and gently. It can also trigger certain operations, such as right click: you only need two fingers to tap or tap to complete the right-click operation.
Apple's official website has more information on the operation of the touchpad. Here, six basic gestures are posted for everyone:
Seeing here, the basic instructions for Mac will come to an end. Although some basic functions are introduced, it is important that we choose to use the Mac. We must understand its characteristics to find the secret to use it. This is also a good way to increase the efficiency of use. The above only describes the very basic functions of the Mac. It also has a lot of highlights worth discovering and exploring, such as the Multi-Touch Bar, Lanuchpad, Siri, etc. that are not described in this article. These contents are also worth a try.
The most basic and simple function introduced here is to facilitate the new students who are new to Mac, and it is also an experience to be used by some Macs. I hope you will gain something by reading them.
High Quality Tablet Ram 4GB/8GB/16GB SODIMM UDIMM DDR4 8gb Laptop 2400mhz Ram
Model
DDR4 SODIMM
Brand
Semsotai /OEM /ODM /OBM
ECC
Non-ECC
Capacity
4GB/8GB/16GB
Chipsets
Samsung /SK Hynix/Mircon/Spec tek
Frequency
2133MHz/2400MHz/2666MHz/3200MHz
Speed
PC4-17000/PC4-19200/PC4-21300/PC4-25600
Componets Configuration
(256m/512m/1G) x8/x16
Memory CAS Lantency
CL15/CL17/CL19/CL21/CL22
Supply Voltage
1.2V
Pin Count
260PIN
PCB layer
8 /10 layer high speed PCB
Certificate
CE/FCC/ROHS
Operation temperature
0C-95C
Compability
100% Work with all motherboard
Ddr4 Laptop Memory,Ddr4 Rgb Ram,Ddr3 Ram 8Gb Pc 1600,Game Ddr3 8Gb
MICROBITS TECHNOLOGY LIMITED , https://www.hkmicrobits.com
